Instructions for a tree bench

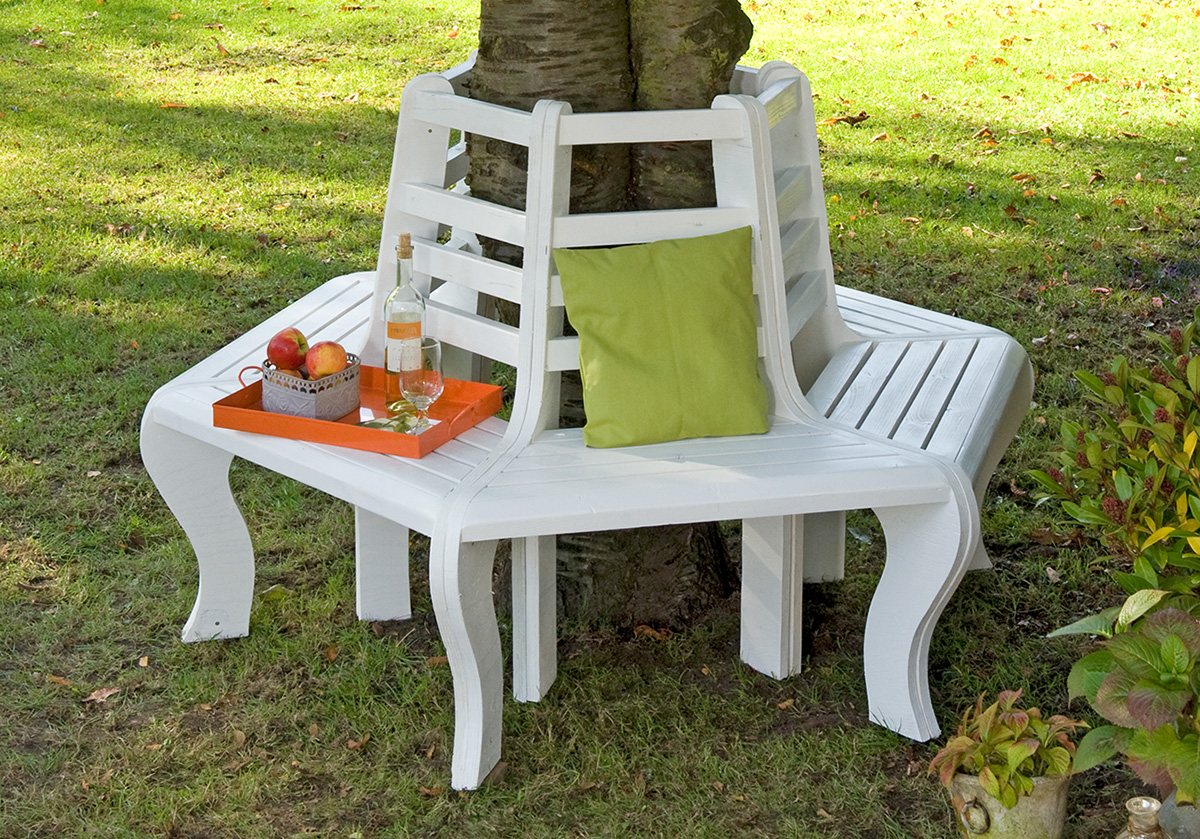
In just a few steps, build a eye catching feature for your garden. With your tree bench, you can create not just a cosy seating area for you to spend quality time with your family and friends, but you can also create a truly decorative piece.

  • Angle irons
  • Metal ruler
  • Screw clamps
  • Measuring tape or metre rule
  • Wood drill
  • Screwdriver

Side parts

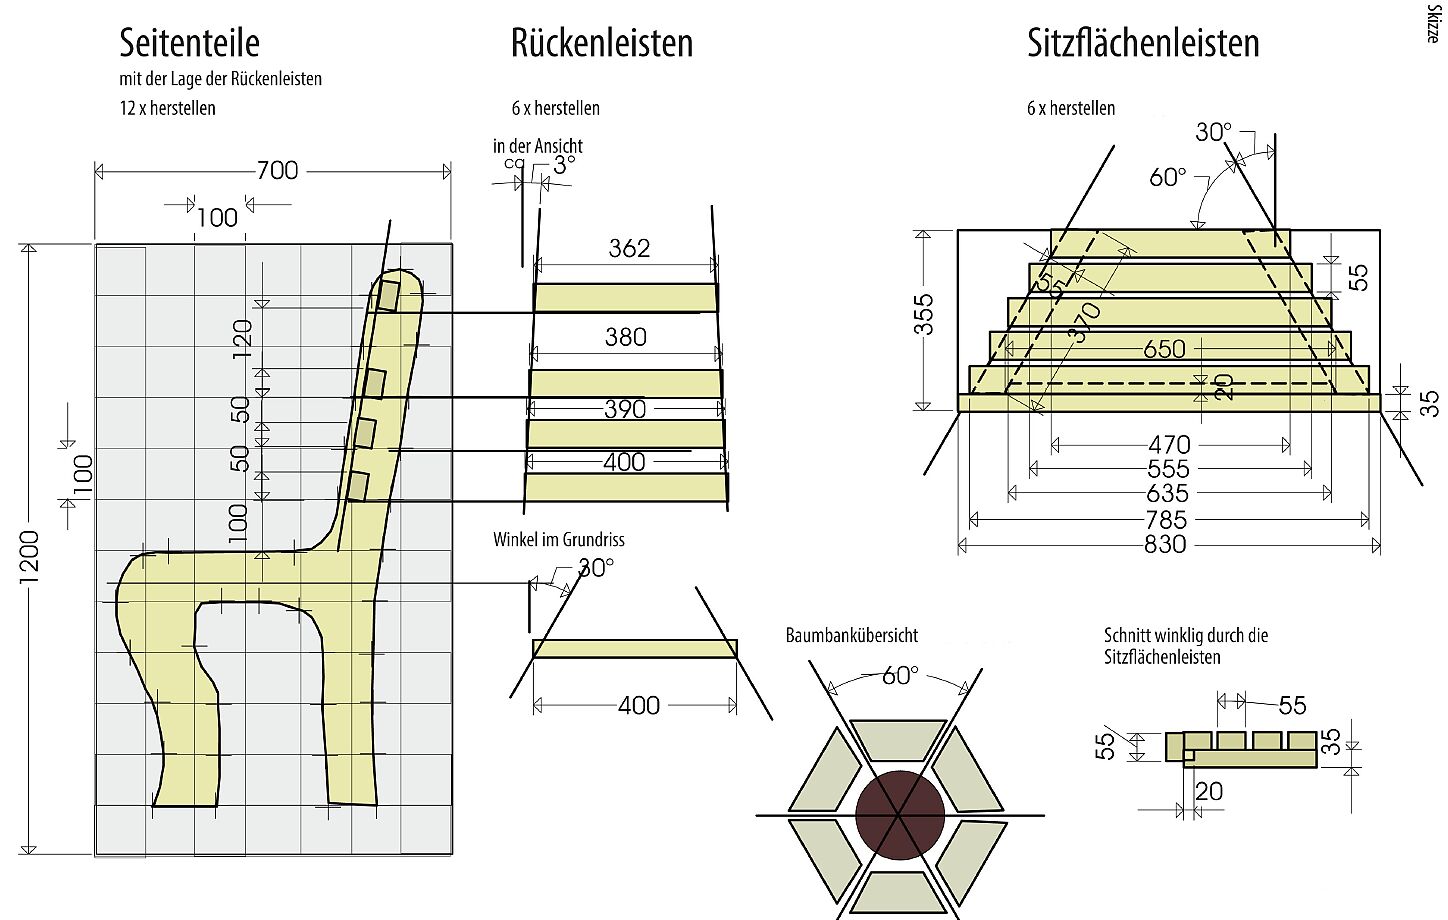
  • 12 Side panels 700 x 1200 x 24 mm Plywood


Backrest

  • 6 x upper cross-beam 362 x 35 x 55 mm (squared timber)
  • 6 x second cross-beam from the top 380 x 35 x 55 mm (squared timber)
  • 6 x third cross-beam from the top 390 x 35 x 55 mm (squared timber)
  • 6 x bottom cross-beam 400 x 35 x 55 mm (squared timber)


Seating surface

  • 6 x rear seating board 470 x 35 x 55 mm (squared timber)
  • 6 x second seating board 555 x 35 x 55 mm (squared timber)
  • 6 x middle seating board 635 x 35 x 55 mm (squared timber)
  • 6 x second seating board from the front 785 x 35 x 55 mm (squared timber)
  • 6 x front seating board 830 x 35 x 55 mm (squared timber)
  • 6 x support strip for cross-beam 650 x 20 x 20 mm (strip)
  • 12 x connecting slats 370 x 35 x 55 mm (squared timber)


 Accessories

  • 6 Connecting sleeves M8
  • 6 Cross-head screw M8
  • Wood stain or similar
  • Construction glue or wood glue
  • Stainless steel wood screws

Sketch 1

Step-by-step guide for building and painting a tree bench

Step 1 of 8: Side pieces of the seating surface

Side pieces of the seating surface

Purchase the materials from the enclosed list. Draw a 10 x 10 cm grid on a board and transfer the outline of the side pieces from the enclosed sketch (left image). Cut out the parts using a jigsaw. Then sand and round off the edges. Coarsely cut the slats (35 mm x 55 mm), align them and draw on the centre point (right image).

Step 2 of 8: Cutting the seat to size

Cutting the seat to size

Align at a 90-degree angle and using 1 cm spacer blocks (left image). Then draw on the overhang at a 30-degree angle. Place the wood for connecting the seating surface on the underside and first draw on the overhang and then cut it off (right image).

Cutting the seat to size

Align at a 90-degree angle and using 1 cm spacer blocks (left image). Then draw on the overhang at a 30-degree angle. Place the wood for connecting the seating surface on the underside and first draw on the overhang and then cut it off (right image).

Step 3 of 8: Gluing the seating surface

Gluing the seating surface

Before the seat slats are screwed to the seat connecting piece, glue must be applied. Then screw the slats into place (left image). Place the lath for the front edge of the seating surface in position and transfer the angles of the two angled sides. Here too, glue must be applied before connecting the screws. The seat surfaces are glued to the side pieces and then screwed into place (right image).

Tip: Use screw clamps to temporarily fix the parts in place. Round off the front seat edge with an electric sander.

Gluing the seating surface

Before the seat slats are screwed to the seat connecting piece, glue must be applied. Then screw the slats into place (left image). Place the lath for the front edge of the seating surface in position and transfer the angles of the two angled sides. Here too, glue must be applied before connecting the screws. The seat surfaces are glued to the side pieces and then screwed into place (right image).

Tip: Use screw clamps to temporarily fix the parts in place. Round off the front seat edge with an electric sander.

Step 4 of 8: Backrest

Backrest

Determine and then draw on the position of the slats for the backrest (left image). Using a measuring tape or metre rule, measure out the long side of the slats for the backrest. Also determine the angle (30°) and inclination (3°). Shorten the slats for the backrest with a cross-cut at the ends at a 30° angle.

Tip: Use a mitre saw. Glue in the slats and then screw them into place (right image).

Backrest

Determine and then draw on the position of the slats for the backrest (left image). Using a measuring tape or metre rule, measure out the long side of the slats for the backrest. Also determine the angle (30°) and inclination (3°). Shorten the slats for the backrest with a cross-cut at the ends at a 30° angle.

Tip: Use a mitre saw. Glue in the slats and then screw them into place (right image).

Step 5 of 8: Installation

Installation

Line the elements up next to each other and secure using a hand clamp. Drill the bench elements using an 8 mm wood drill bit (left image). Open up the pre-drilled hole from the other side using a 10 mm wood drill bit to a depth of approx. 2 cm. This is needed in order to be able to screw in the connecting sleeve later. The connecting sleeve is screwed in using a flat screwdriver (right image).

Step 6 of 8: Preparing the sprayer

Preparing the sprayer

Open the tin containing the paint in the required colour using the stirrer included and align the suction pipe on the spray attachment so it is facing forwards. Fill paint up to the 3/4 mark on the paint container and dilute it. Place the stirrer against the base of the filled paint container. The distance between the notches represents a dilution of 10%. Stir the paint well and carry out a test spray. The spray nozzle can be positioned in three different directions. A horizontal jet to work from top to bottom, vertical for right to left or selective for particularly intricate areas. The quantity of paint is full adjustable with the dial on the trigger.

Step 7 of 8: The spraying process

The spraying process

Start with corners, edges and angles and then spray the surfaces. Spray from the outside with a uniform distance over the slats. Only change the direction of spray outside the slats. This avoids a build-up of thicker layers of paint during direction changes.

Tip: Since paint applied too thickly can cause drips, it is better to spray two thin coats. After spraying, allow the paint to dry in accordance with the manufacturer's instructions.

The spraying process

Start with corners, edges and angles and then spray the surfaces. Spray from the outside with a uniform distance over the slats. Only change the direction of spray outside the slats. This avoids a build-up of thicker layers of paint during direction changes.

Tip: Since paint applied too thickly can cause drips, it is better to spray two thin coats. After spraying, allow the paint to dry in accordance with the manufacturer's instructions.

Step 8 of 8: Cleaning

Cleaning

Clean the spray attachment thoroughly with water or solvent after use.

The result

More projects

WAGNER Group W 100 Produktbild

Wood&Metal Sprayer W 100

The handy solution for small and medium-sized projects with paints and varnishes

Wood&Metal Sprayer W 100
Produktfinder

WAGNER product finder

Here you can find more products

Go to products
Spraying varnishes: Instructions & tips

Spraying varnishes: Instructions & tips

Learn here how best to proceed when spraying varnish, what you should look out for, why it's worth spraying varnishes and what the best equipment is for it.

Spraying varnishes