Questions & Answers for HVLP sprayer

We have gathered together the most frequently asked questions about HVLP sprayer for you. To help you find the answer you can filter for product name or work steps. If you don't find the answer you're looking for, contact our hotline.

Product name

Work step

Diluting may be necessary on smooth surfaces and for viscous, gel-like materials. Mixing with water is also recommended if the atomisation is too coarse or the volume of paint is too low (even on the maximum setting).

Detailed information on the individual materials and the maximum dilution can be found on the material manufacturer’s technical data sheet (available online).

First, try spraying without diluting the paint. If the atomisation is not fine enough or edges appear, dilute in 5-percent increments using the stirring rod.

Detailed information on specific materials and the maximum permissible dilution can be found on the material manufacturer’s technical data sheet. This is available online.

Stir the material in the original container. A mixer is recommended for interior wall paints. Be sure to use the paint at room temperature. You may need to dilute the paint.

Cover all surfaces and objects that are not to be sprayed or remove them from the working area.

We recommend the Universal Extra Masking Kit for this.

Separate the spray attachment from the turbine and pour the remaining paint back into the original container. Clean all paint-carrying parts with the appropriate cleaner. For water-based paints, warm water with a little detergent is recommended.

Tip: The earlier you clean your paint sprayer after use, the easier it is to remove the paint. More videos on cleaning HVLP paint spray systems can be found on the WAGNER United Kingdom YouTube Channel

When working overhead, please align the riser pipe of the spray attachment towards the rear.  Spray at a maximum angle of 30°.

To prevent the hose from becoming kinked during storage, disconnect the hose from the paint sprayer and gun.

You can generally store undiluted paint for a long time if you seal it in an airtight container. If the paint has been diluted with water then the presence of microorganisms may cause the paint to deteriorate (mould growth).

You can generally store undiluted paint for a long time if you seal it in an airtight container. If the paint has been diluted with water then the presence of microorganisms may cause the paint to deteriorate (mould growth).

  • Uniform paint application
  • Smooth, more resistant surface
  • Fast working speed
  • High covering capacity
  • Easy coverage of corners and edges
  • Hard-to-reach areas
  • Textured surfaces

We recommend spraying in a vertical spray direction. Move the device at a constant distance of 10-30 cm (depending on the spray attachment and material) and at a constant speed. Make sure that the spray overlaps the previous spray slightly in order to achieve a uniform paint coverage. You can also achieve this by “cross-coat” spraying, in which you apply the paint first vertically and then horizontally.

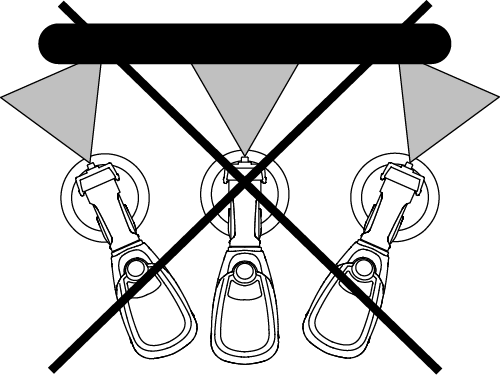
Work away from the light. Start with the ceiling. Then do the window recesses and the corners and edges of the area that you want to spray. Next, spray the area with a spray jet adjusted to suit your preferred working direction.

  1. Remove old, loose paint or varnish with a scraper and sandpaper and fill in any holes with a suitable filler. Remove any dirt and moss from any old paint. Then evenly sand the surface with fine sandpaper.
  2. Always apply several coats of the material (see the manufacturer’s instructions). The paint must be suitable for use with the surface/old paint. Prime untreated wood or plastics with a protective primer to improve adhesion and metal with a rustproofing product.
  3. The “Wood&Metal” spray attachment is suitable for the application of primers, varnish, wood and metal paints. At the start of spraying, set the material volume to low and increase if necessary depending on your working speed. Spray as thinly as possible to avoid “streaks” and reduce drying times.
  4. Start spraying before reaching the edge of the object and carry on spraying beyond it. Keep a distance of 10-15 cm from the object and work at a consistent speed. Spray the non-visible parts of the chairs, tables, hinged shutters, etc., first, then move on to the legs, sides and edges and finish with the most prominent sides.

For more information on spraying varnishes click here and for glazes click here.

HVLP is for: 

  • Small to large projects
  • Little spray mist
  • Quick and easy cleaning
  • Easy to use

Airless is for:

  • Fast working speed
  • High surface quality
  • Robustness
  • Versatility
  • Frequent use
Element 1
  • Reduce air volume
  • Reduce distance from the object
  • Always spray at constant and even distances

The stirring rod is useful when you want to dilute and stir the paint. Place the stirring rod against the base of the filled paint container. The distance between the notches represents a dilution of 10%. Add water and stir well. You can also use the tip of the stirring rod to remove dried-on paint from the nozzle.

HVLP stands for High Volume Low Pressure. The low material pressure with the high volume of air ensures slightly larger material droplets and therefore less spray mist.

Unlike air atomisation, airless atomisation technology atomises the air using the material pressure alone, i.e. without the use of any air. A pump pressurises the material and forces a defined quantity through a nozzle. During this process, the material is diffused into a finely atomised spray jet. Airless technology is particularly suitable for the application of emulsions.

HEA stands for High Efficiency Airless. An innovative nozzle technology is combined here with a highly efficient yet pressure-reduced pump. For more information, visit https://www.wagner-group.com/uk/guide/airless-spraying/airless-sprayers-for-do-it-yourselfers/.

No, always use the appropriate WAGNER accessories with the WAGNER paint sprayers, otherwise the guarantee becomes null and void.

Yes, you can spray deep ground with our WAGNER paint spray systems. Deep penetrating primer can be applied with Control Pro as well as with HVLP. The following must be observed during application:

  • Clean the unit immediately after use
  • Ideally use water-based materials
  • Observe the material data sheet

Further information is available on the technical data sheet of the paint manufacturer.

Yes, with our WAGNER paint spray systems you can spray dispersion paint. You need a WallSprayer paint spray system, e.g. W 450, Universal Sprayer, e.g. W 590 FLEXiO or Airless Sprayer Control Pro 250 M. Further information is available on the technical data sheet of the paint manufacturer and here.

No, with our WAGNER paint spray systems you cannot spray any facade paint. Façade paint contains abrasive components which would cause our equipment to wear out too quickly. In addition, especially with coarse surface structures, it cannot be guaranteed that the paint can penetrate into every angle during spraying. We recommend a WAGNER contractor spray system, such as the ProSpray 3.21 and rolling with the roller.

Yes, with our <link uk do-it-yourself products-and-accessories paint-sprayer>WAGNER paint spray systems you can spray primer. Further information is available on the technical data sheet of the paint manufacturer.

No, you cannot spray lime paint with our WAGNER paint spray systems.

Since there are different compositions of materials, different viscosities and also qualities of dispersion adhesive/non-woven adhesive, we cannot recommend it without reservation. In the worst case, the unit will stick together during processing and is irreparable afterwards. In this case the company WAGNER does not give any guarantee.

We would like to ask you to check whether the weather protection paint can be sprayed. The manufacturer refers to this on the container. If this is the case, the W 590 is suitable. Please note that the paint must be thinned if necessary. For further information, please refer to the technical data sheet of the paint manufacturer.

Silicate interior paint:
You can spray silicate interior paint with our WAGNER paint spray systems from the HVLP DIY series. Please note that when applying silicate interior paint, surfaces such as windows can be attacked and damaged. Accordingly, mask these surfaces well in advance. For further information, please refer to the technical data sheet of the paint manufacturer. 

Silicate exterior paint:
Silicate exterior paint should not be applied with our WAGNER DIY equipment, neither with airless nor with HVLP equipment. 
We recommend the use of an airless handyman device (e.g. ProSpray 3.21 / SuperFinish 23 or larger). In addition, we recommend re-rolling with the roller,
as with a very coarse surface structure it cannot be guaranteed that the paint will penetrate into every corner.

In order to achieve the optimal coating of surfaces, they must be clean. All dirt, dust, oil, water, etc. should be removed.

  1. When you prepare a room for spraying, remove the ceiling rose, light switches and sockets. ATTENTION: Disconnect the power supply first. 
  2. To attach the cover to the ceiling, use masking tape, which you apply every few metres. 
  3. Protect the floor and skirting boards with plastic sheets and fix this in place with masking tape.
  4. Cover all doors, windows or radiators with a plastic sheet.
  5. Use masking tape to attach the sheet to both sides of the door or window.
  6. Spray the ceiling first, then the corners and finally the walls.
  7. Remove the tape before the paint dries completely (slowly peel off the tape). We recommend the Universal Extra Masking Kit for this. 

If you use the wall spray attachment for wood and metal paint this would let out too much paint and could certainly spoil your paint finish. Using the wooden metal attachment to spray emulsion will not allow enough paint to come out of your sprayer and you are going to get poor coverage. It is going to slow you down and your paint might be so thick that it continuously blocks and clogs your attachment. If you are unsure which attachment is which just refer to the user manual.

The suction tube in the spray attachment needs to point in the right direction depending on the surface that you are spraying. The suction tube needs to face forwards if you are spraying the surface directly in front of you, it can stay in the same position if you're spraying the surface below on the ground. If you want to spray the surface above you reverse it to point to the rear.

For the best results your paint should be a similar consistency to single cream. The paint should flow freely from the stirring stick and leave no trail on the surface. If this is not the case, you can dilute your paint by five to ten percent. If it is a water-based paint just use water. If it is an oil or solvent based use whatever is recommended by the paint manufacturer.

If you have paint leaking out of the front of your sprayer there are a few things you can check. The union nut needs to be tight, otherwise you will not get a proper seal around the needle. Also check there are no cracks or any damage around the nozzle as either of these will cause the nozzle to leak paint.

Many WAGNER paint sprayers have a two-part trigger. By slightly pulling the trigger this starts the turbine, when you pull the trigger further for the second stage the paint starts to flow. If you don’t let the pressure build up there will not be enough pressure for a smooth flow of paint and it will cause the paint to spit.

If your paint sprayer appears to be set up properly but there's still no paint coming out there could be several reasons for this. Firstly, check you have enough paint, if not fill up the paint container. There are also two important parts to check, the suction tube and the air tube these can become blocked with paint or not fitted correctly which can prevent the paint container from becoming pressurized and spraying properly or at all.

Make sure the surface is clean dry and dust free. Ensure that you are the right distance from the surface either 5-15 cm or 20-30 cm depending on which attachment you are using. When you spray from top to bottom try to avoid pulling the sprayer away at the top or the bottom as this can create overspray. Ensure that you maintain a 90 degree angle to the surface. Always keep the sprayer moving at a consistent pace. When starting to spray make sure you are moving the sprayer before you pull the trigger. Make sure you release the trigger before you finish the movement.

The air filter on your paint sprayer needs regular cleaning. Simply remove the filters then clean with some hot soapy water then after rinsing leave to dry and then put then back. Alternatively, you can just replace them with new ones.

Back