Build your own desk attachment: more ergonomics in the home office

Not everyone has the space and opportunity to set up their own office at home and acquire state-of-the-art, ergonomic furniture. You can still find a remedy: By buildinga desk attachment yourself. Because with a little skill, you as a do-it-yourselfer can also create flexible solutions for ergonomic working yourself - and comparatively cheaply as a DIY project!

Instructions: How to build your own wooden desk attachment

Even before we look at the materials needed, it is important to see what surface area you need and at what height. So grab your tape measure!

For the storage area, place your work materials on the table: Laptop or screen, keyboard and mouse. Then measure generously how big you want the top of your desk attachment to be. For example, if you want to place a laptop and monitor next to each other on the raised desk top, a width of at least 70 centimetres is recommended. The shelf should also be large enough so that it is possible to rest your forearms.

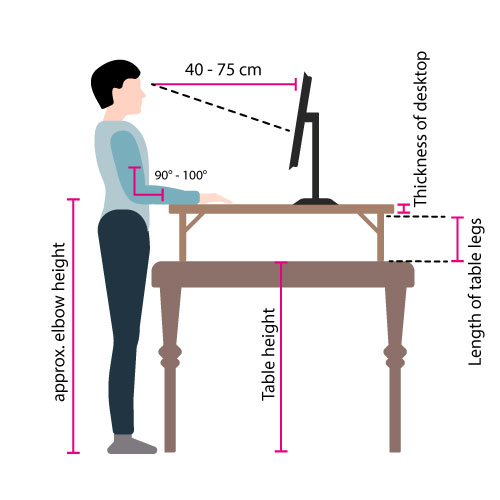
Now turn your attention to the question of how high the desk attachmentshould be. First measure the height of the deskyou want to upgrade to a standing desk. In the next step, measure from the soles of your feet to your elbows. The best way to do this is to imitate the posture you adopt when working: Let the shoulders sink down in a relaxed manner and raise the forearms so that they form a right angle to the upper arm.

Now you have to do a little maths: Subtract the table height from the measured body height. Also subtract the thickness of the tabletop. The resulting number is the length of the legs of your desk attachment!

Therefore, Length of the table legs = height from the soles of the feet to the elbows - table height - thickness of the top of the desk attachment

And when you don't need the desk attachment, it folds up in seconds and can be stored in a space-saving way.

icons8 fehler

Caution:

Make sure that the legs can still be folded in. If the table legs are a little too long, you can think about making the top of the standing table a little wider.

Make sure that the legs can still be folded in. If the table legs are a little too long, you can think about making the top of the standing table a little wider.

Material: This is what you need for your desk attachment for the screen or laptop

Now it's time for the shopping list. You will need the following materials for your desk attachment:

  • 1 wooden board (e.g. pine, approx. 18 mm thick)
  • 1 long frame wood for:
    • 4 table legs
    • 2 crossbars
  • 2 folding brackets
  • 2 metal hinges
  • 4 angle brackets
  • Screws
  • 4 felt pads (so that the feet do not scratch the floor)
  • Paint/Varnish

In our example of a desk attachment, the wooden top measures 90 x 75 cm and the table legs are 31 cm long. The dining table, on which the standing workstation attachment is placed, has a height of 75cm, matching the 1.80m height of our individual.

Then there are the tools:

  • 1 tape measure or folding rule
  • Sandpaper (240 grit)
  • Sanding block
  • Screwdriver or electric screwdriver
  • W 590 Flexio sprayer

Step 1: Sawing the wooden parts

Step 1: Sawing the wooden parts

If you have a suitable saw at hand, you can cut the wooden parts yourself. Otherwise, your local DIY store will do it for you - usually even free of charge!

Step 2: Sand edges

Step 2: Sand edges

Now take your sandpaper and sanding block. Carefully sand smooth all the edges of the wood to remove splinters.

Step 3: Screw the table legs to the crossbars

Step 3: Screw the table legs to the crossbars

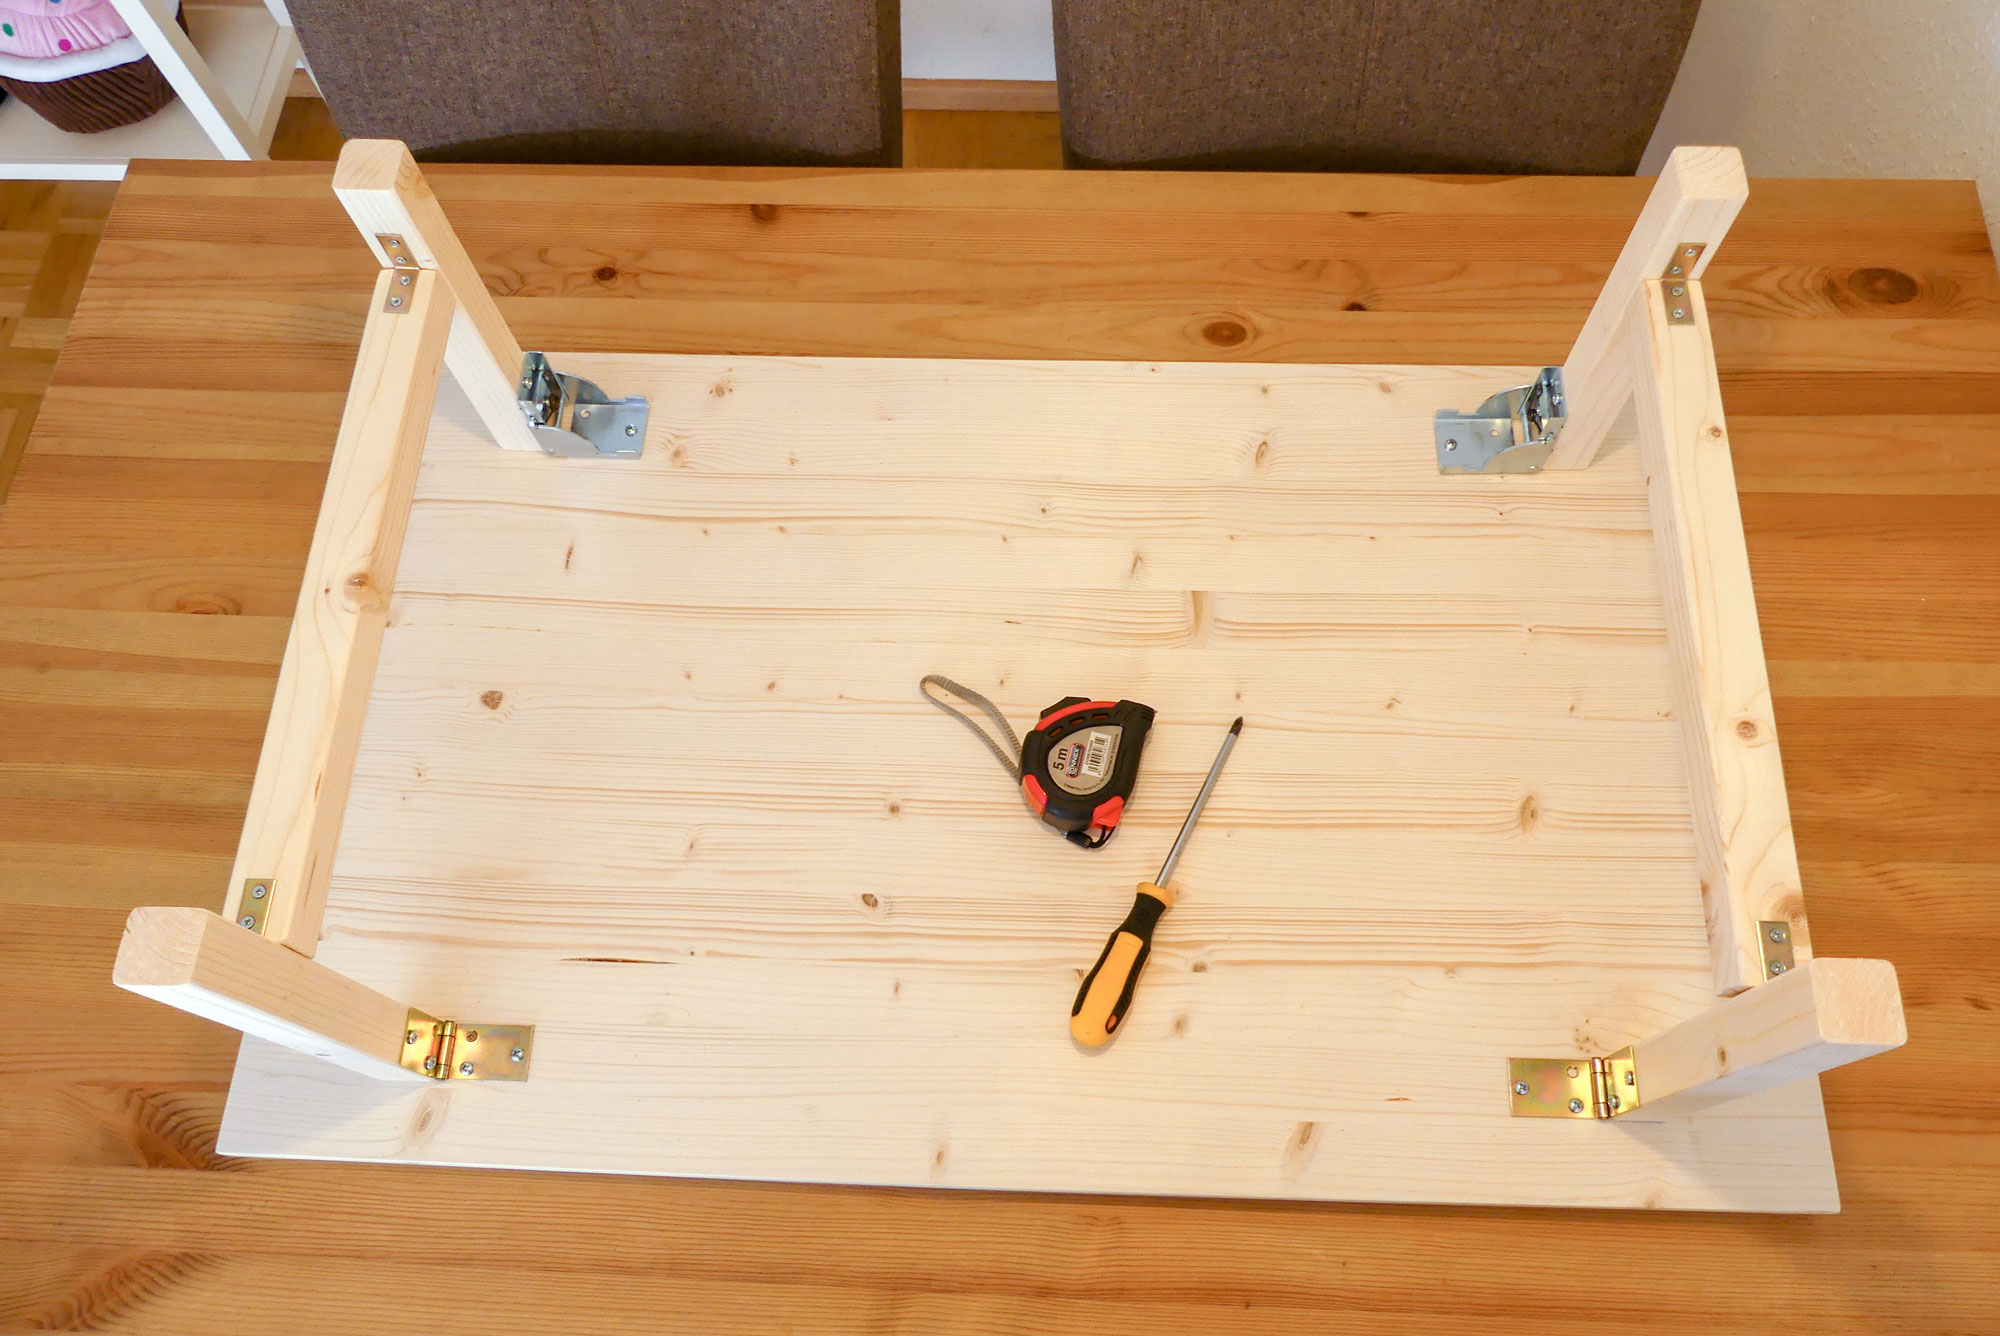
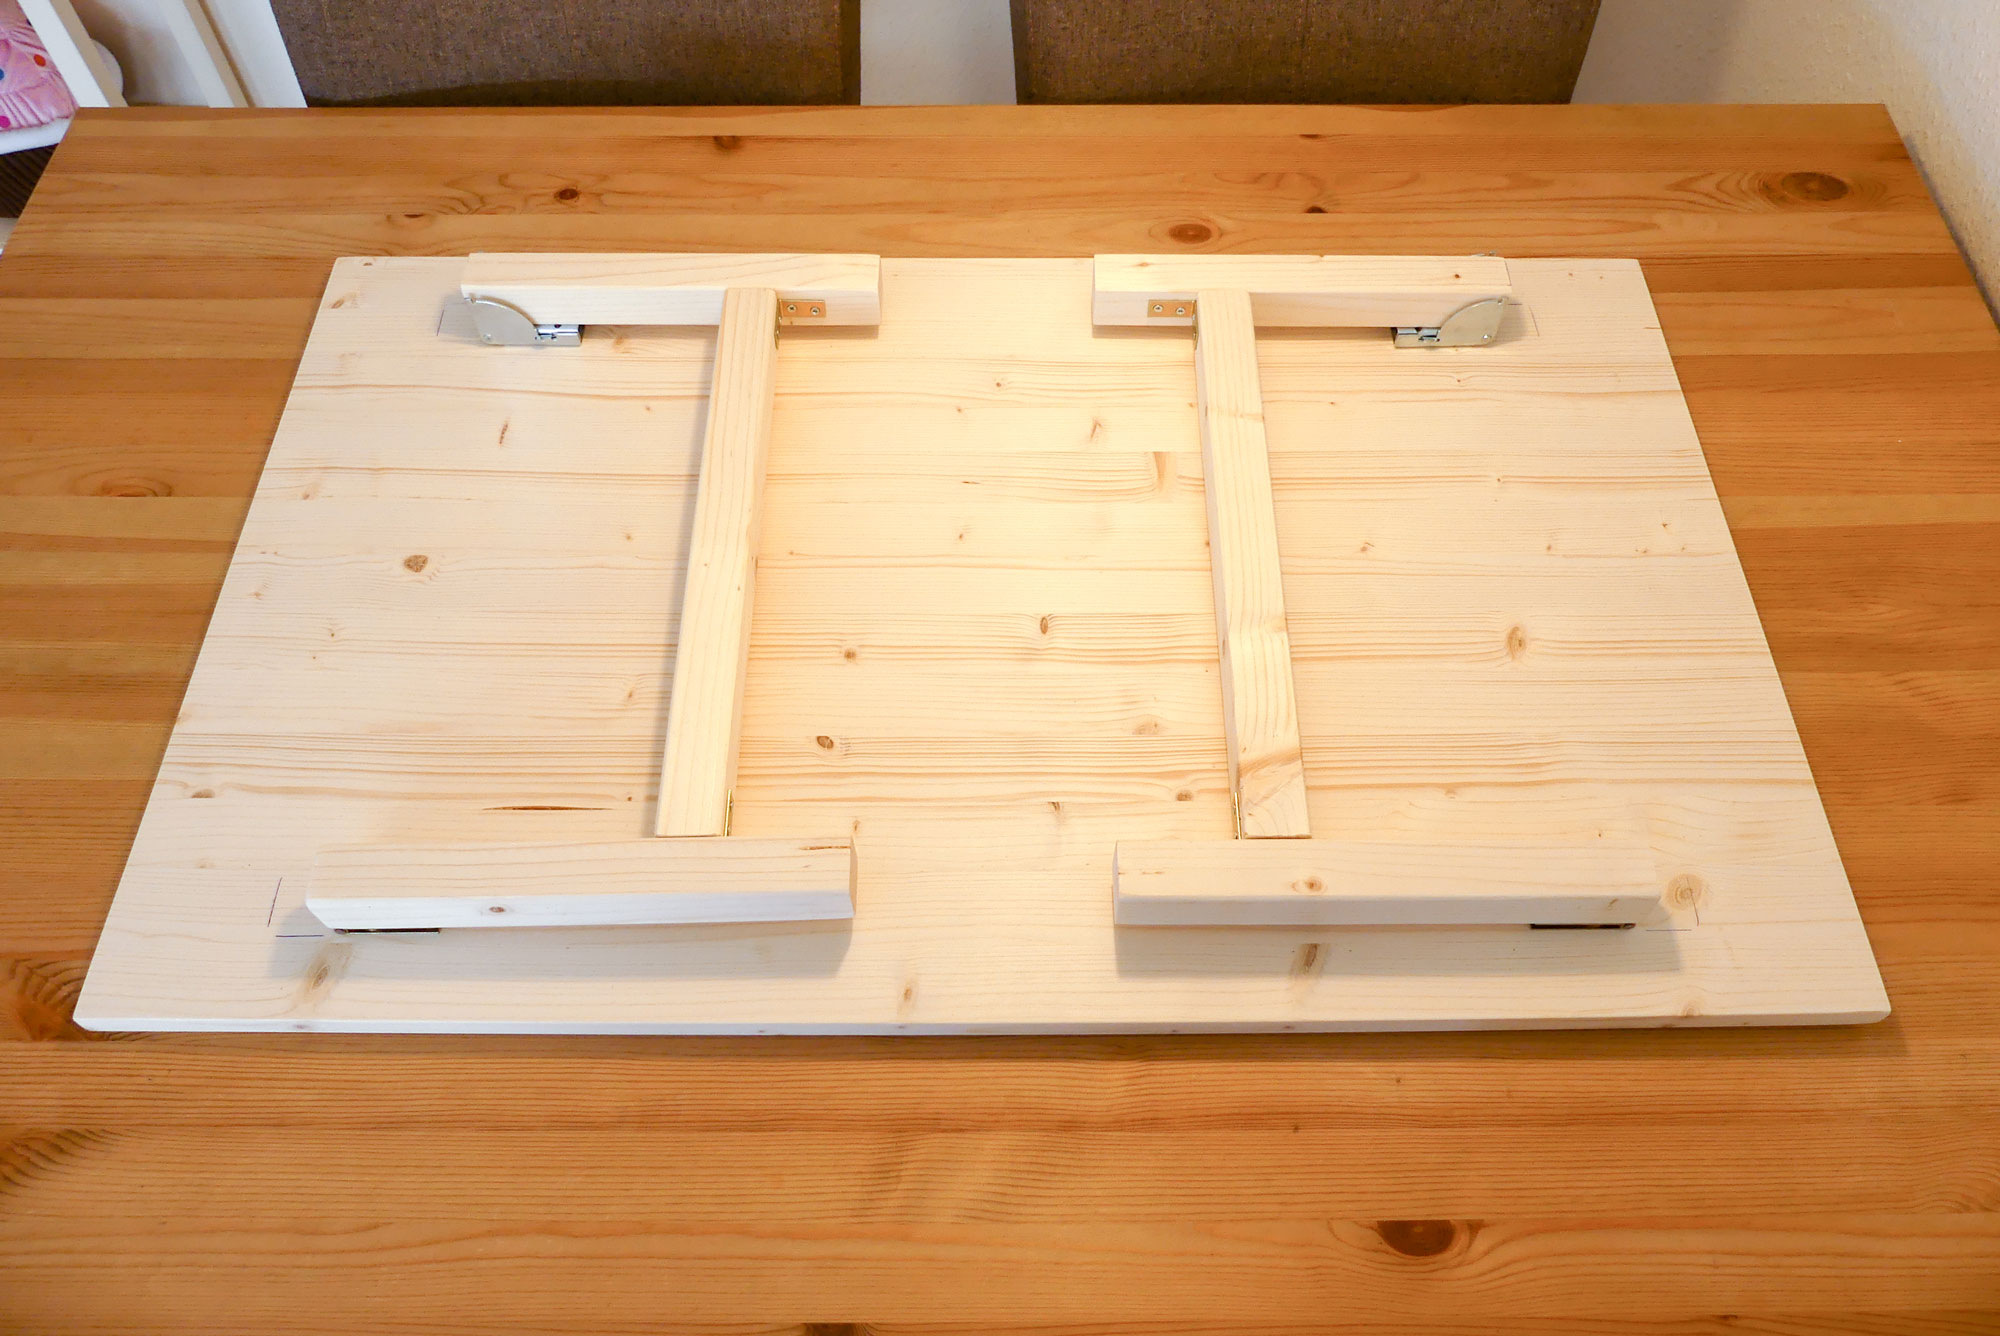
Determine the distance the crossbar should be from the base (e.g. the dining room table). For simplicity's sake, you can just use the middle. However, it is better to divide the total length of the table legs into thirds and add the crossbar to the bottom third. Marking out the position of all the table legs. Then lay down a table leg and place the crossbar perpendicular to it. Then place a folding chair bracket and screw the two timbers together. Then screw on the other table leg and repeat the process for the other side.

Step 4: Attach the table legs to the table top

Step 4: Attach the table legs to the table top

Now place table legs vertically on the top of your pedestal - and check again that you can fold them in properly. Now mark the place where you want to attach the table legs with the folding brackets and hinges. Each table leg should have the same distance to the edge of the top, both at the transverse edge and the longitudinal edge. Then screw one folding bracket and one hinge per leg element.

Tip: You can pre-drill the holes for the screws, this makes it easier to attach the brackets when you are using a screwdriver!

Step 5: Spray the desk top with varnish or paint

Step 5: Spray the desk top with varnish or paint

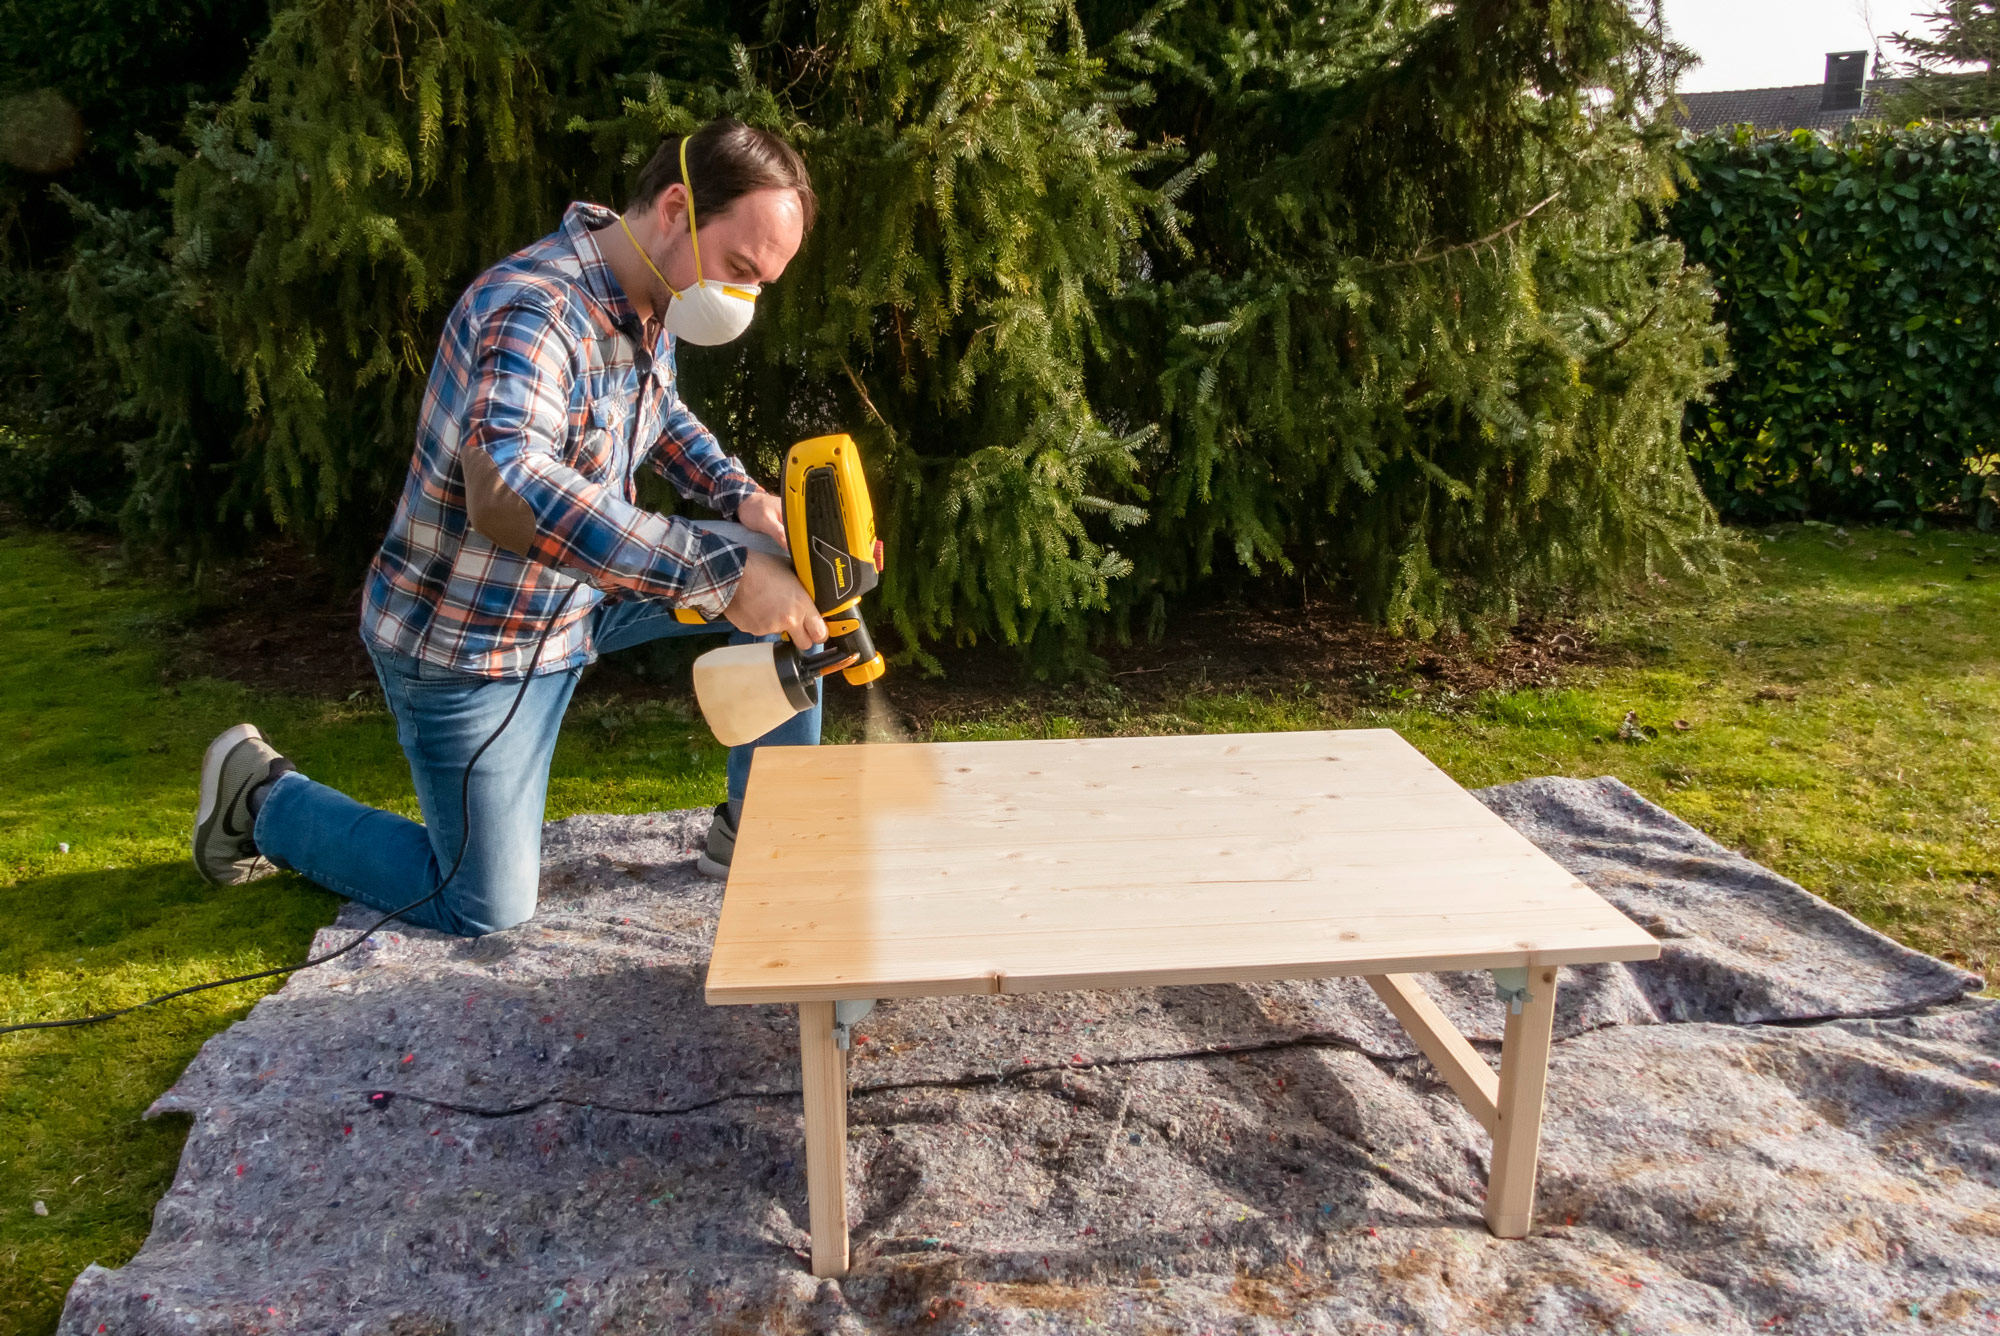
Now take your WAGNER paint sprayer, e.g. the W 590 FLEXiO. It is best to go outside or cover the area well with plastic or painter's dust sheets. Fill the paint or varnish into the paint container and dilute it by 10% with water if required.

Tip: Our stirring stick, which is included with the paint sprayers, helps here!

Step 6: Assemble the desk attachment

Step 6: Assemble the desk attachment

Once everything is dry, stick the felt glides to the bottom of the feet of your pedestal so that they do not scratch the top of your table. And your small height adjustment for the desk top is ready for use. Try out your standing desk right away and see how it works with the new work surface!

Then spray on the varnish or paint at a constant speed and at an angle of 90 degrees. Ideally, always keep a distance of around 15 to 20 centimetres from the wood!

The result

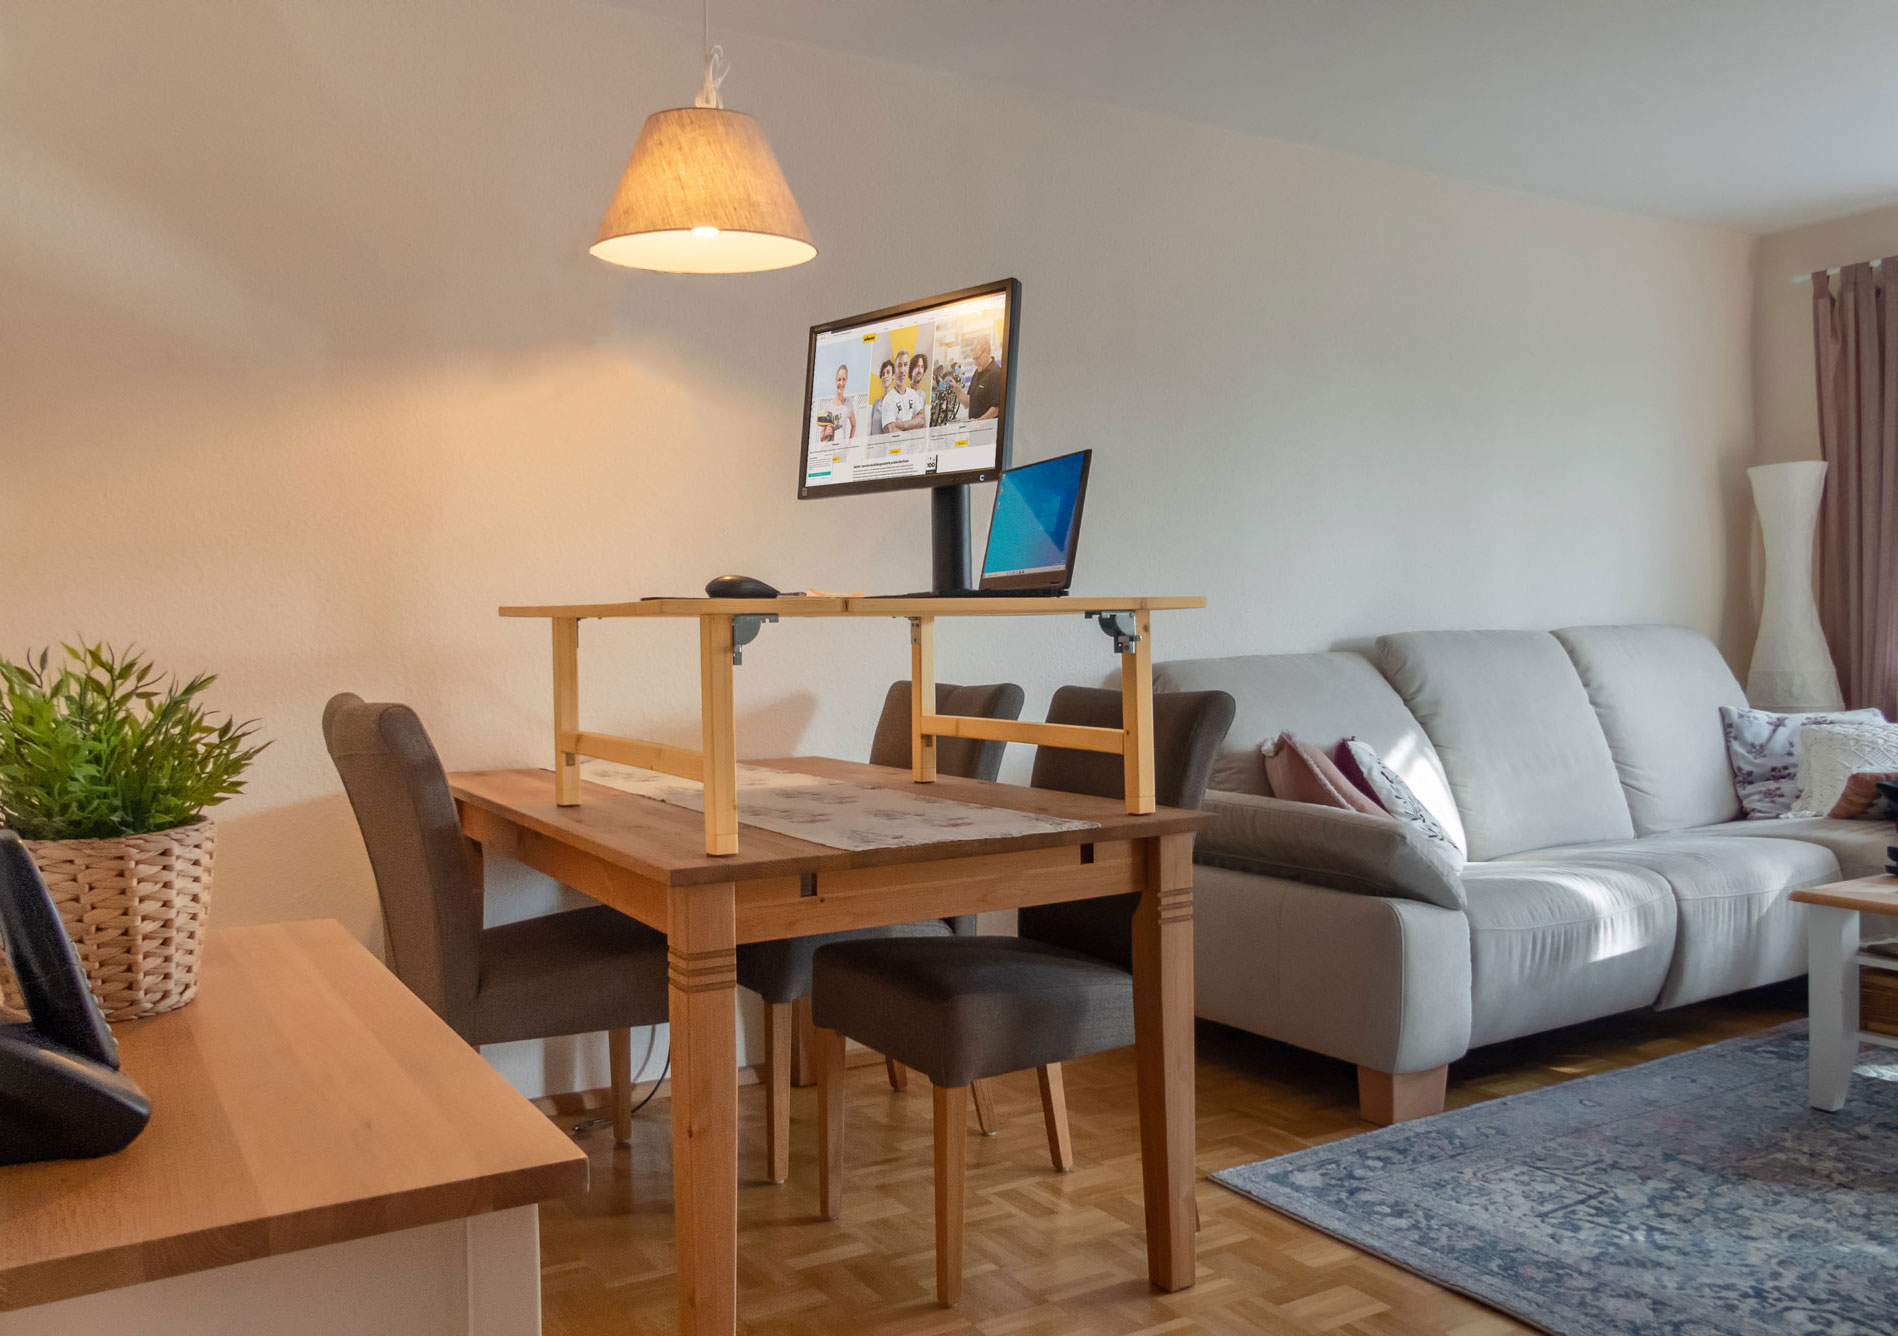
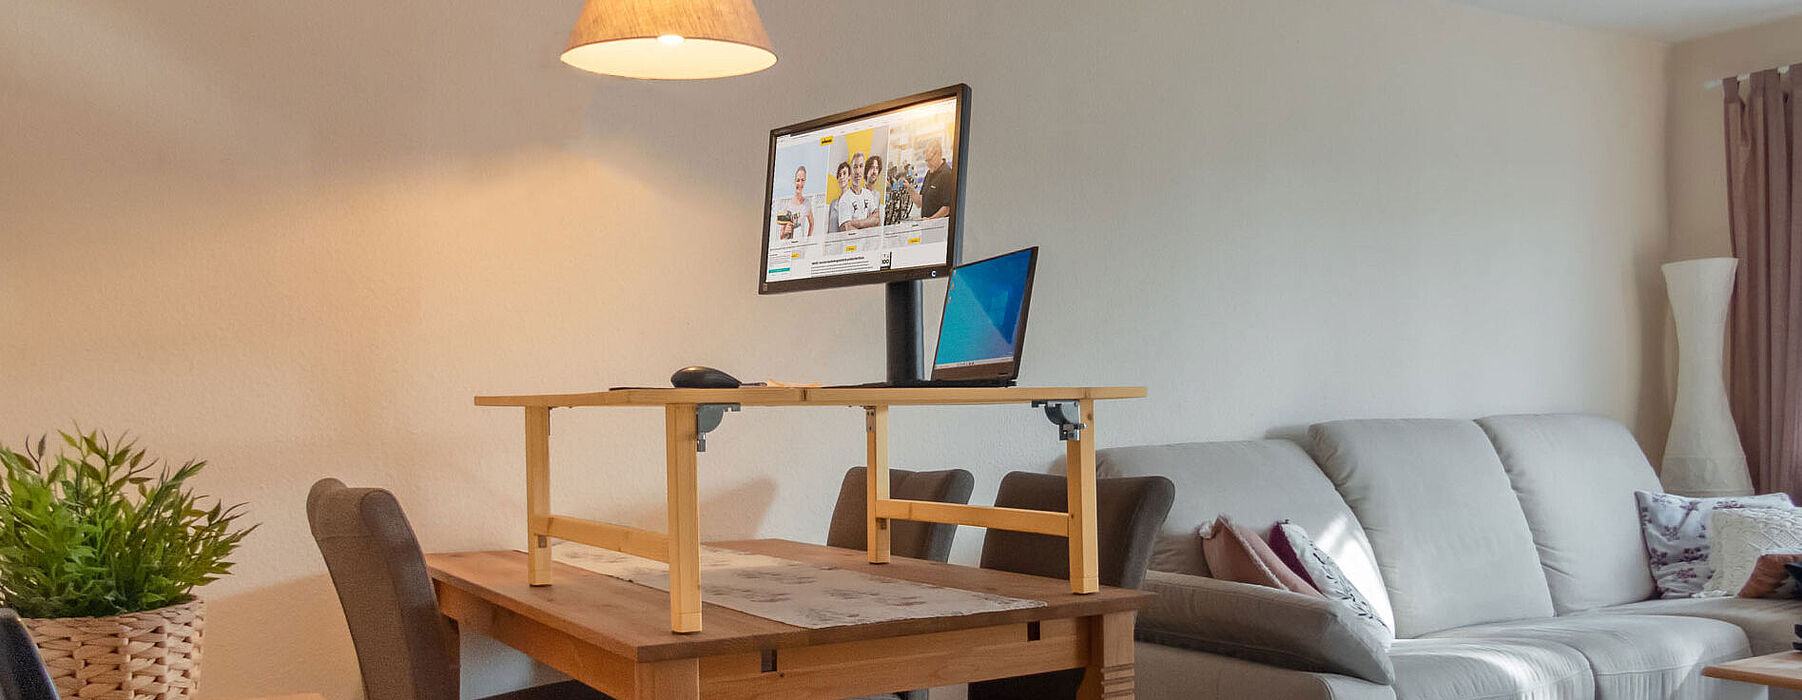
A desk attachment that can be easily put up or taken down for more comfort and ergonomic working.

And when you don't need the desk attachment, it folds up in seconds and can be stored in a space-saving way.
Why should I paint or varnish a desk attachment for a standing workstation?

Paint or varnish has two advantages: Firstly, of course, you can use it to design the top for your desk, in the colour and degree of transparency that you like. Do you still want the grain of the wood to show through and you only want to tone down the desk attachment? Then a varnish is suitable. If you want to apply an opaque colour, you can use paint.

However, paint and varnishes also seal the wood so that it is not damaged. They also protect against tea or coffee stains. They also seal the wood fibres, so you are guaranteed not to get a splinter. And if you use old wood (like an old wall shelf) you can sand it down and give it a new shine with a nice paint or varnish!

    Building a standing workstation yourself - why the effort?

    Many people are working from home - but don't have the space for a proper office or the money for modern office equipment like a height-adjustable desk. Help yourself by building your own a desk attachment: It doesn't need expensive equipment or a lot of space for a good working posture. Work with what you have - the dining table or your desk and just place the attachment on it and stand. This gives you variety in your posture, which reduces fatigue, a tense neck and back pain. To put it simply: When we sit for a long time and only move a little, much-needed muscles reduce. If we sit too long, we can miss out on seven years of good physical health, as the Scandinavian Journal of Public Health found in 2007. To separate your workplace spatially, you can also build a room divider yourself.

    The advantages of a desk attachment

    • Ergonomic work with a healthy posture
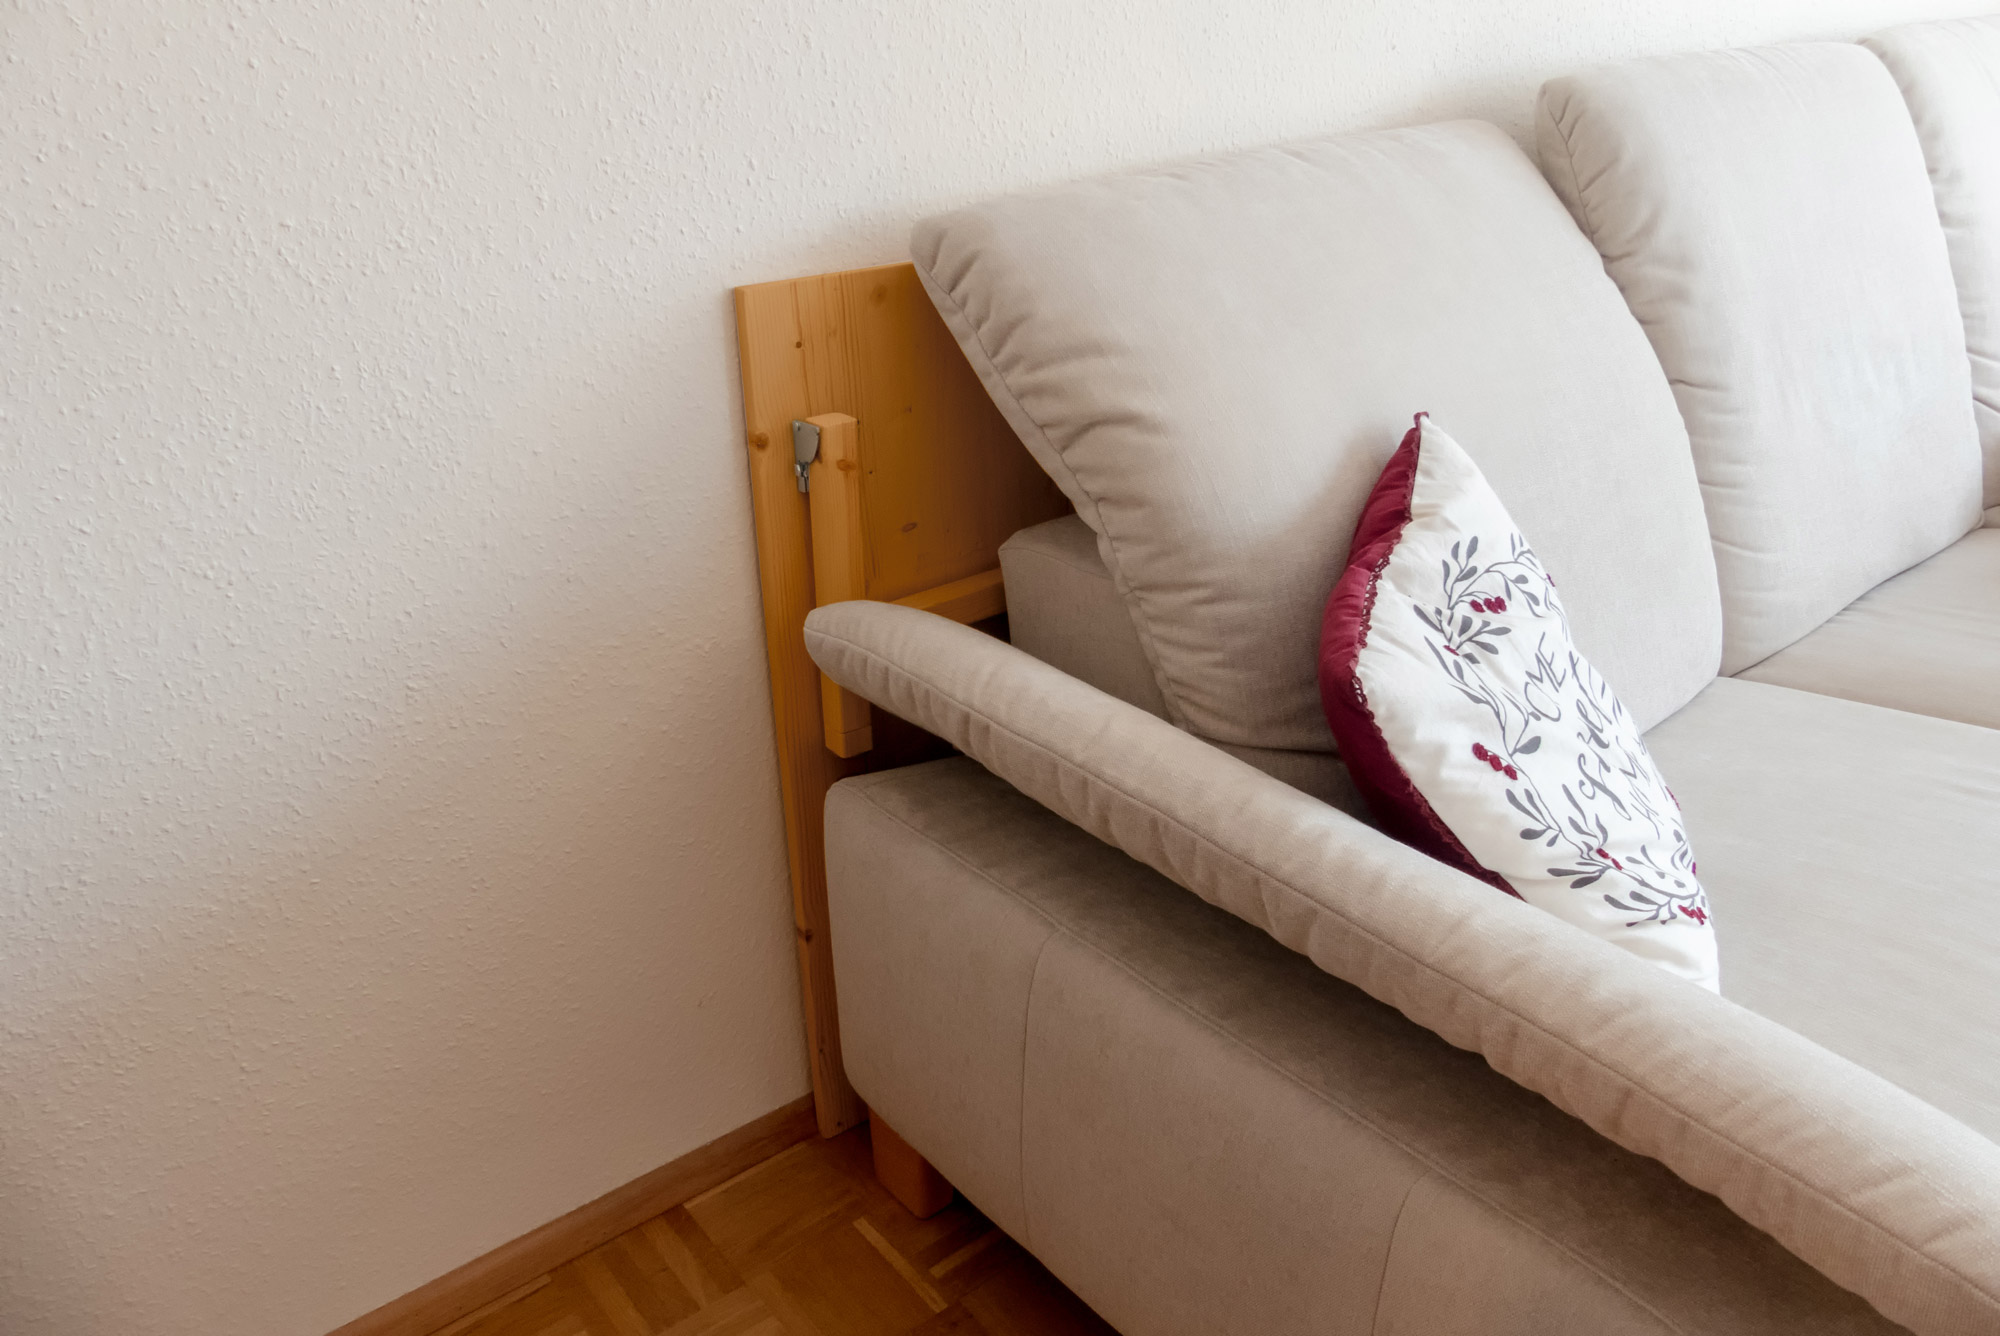
    • Folding table legs: Desk raiser can be easily stored behind the sofa or leaned against the wall
    • Folding brackets lock into position when they are folding out and in and ensure the attachment is stable.
    • Set up and down in seconds

    So building a desk attachment yourself helps keep you healthy. And if you design it yourself, it will also put you in a good mood!
    By the way: You've probably thought of this idea - whether it's breakfast in bed or a cosy movie night: The desk attachment can also be used as a shelf for the laptop or tablet in bed without any problems!

    W 590 FLEXiO

    W 590 FLEXiO

    The flexible hand spray gun for indoor and outdoor use

    W 590 FLEXiO
    WAGNER product finder

    WAGNER product finder

    Here you can find more products

    Go to products
    Spraying varnishes: Instructions & tips

    Spraying varnishes: Instructions & tips

    Learn here how best to proceed when spraying varnish, what you should look out for, why it's worth spraying varnishes and what the best equipment is for it.

    Spraying varnishes