Make a mud kitchen with pallets: DIY project and creative outdoor fun for big and small

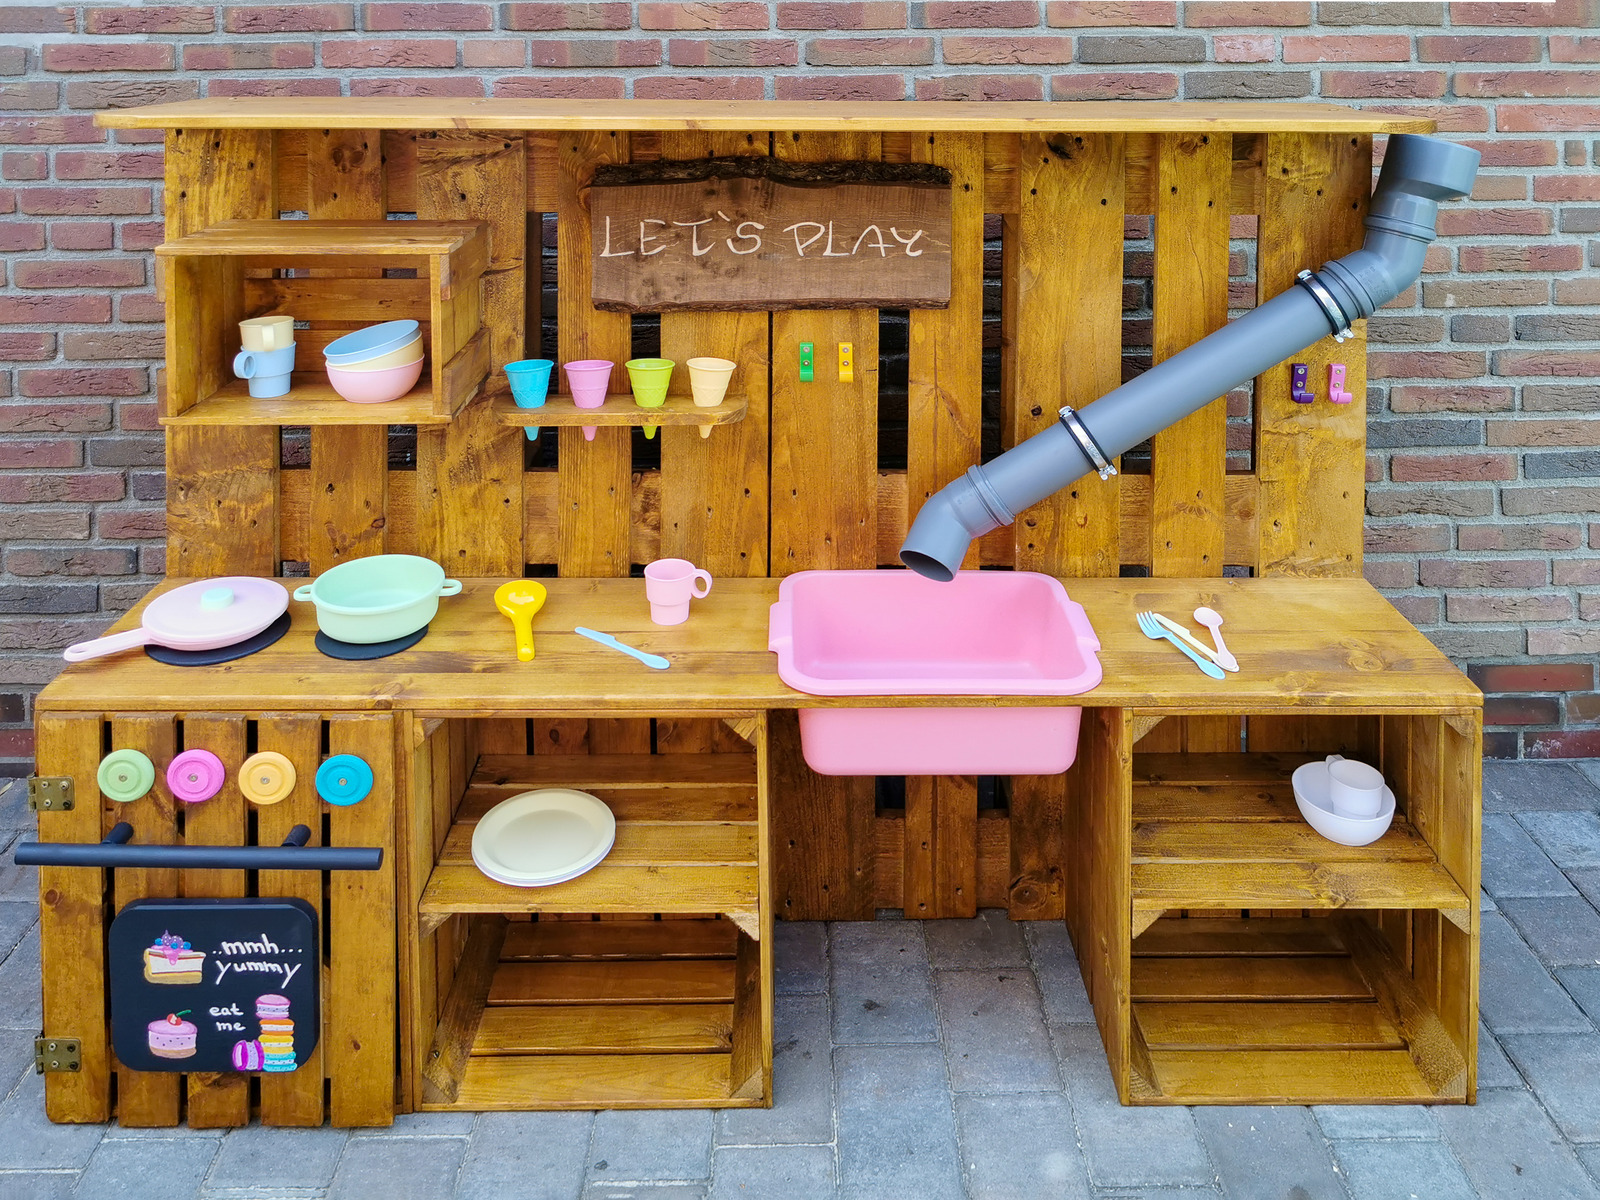
When the weather is nice, there is nothing better for children than to play outside. A mud kitchen offers lots of outdoor fun and stimulates the little ones' imagination at the same time. And what's more, it's very easy to build a mud kitchen from pallets yourself, as Sari and Christian from the blog "Sari's Garage" show step by step in the video. The right stain is also important to protect the kitchen from the weather. The Wood&Metal Sprayer W 100 is a great help during application. With the right accessories and decoration ideas, the mud kitchen for the garden or balcony becomes a place full of fun and creativity for the children and at the same time a great DIY project for creative adult do-it-yourselfers!

By viewing the video you agree that your data will be transmitted to YouTube and that you have read the privacy policy .

What is a mud kitchen and why is it good for children?

Train concentration and physical dexterity with a mud kitchen as a DIY project - no problem! The outdoor mud kitchen is wonderful for stimulating children's creativity as there are no prefabricated routines. In the play kitchen, children can prepare all the dishes, with ingredients that nature offers them: Mud pies, ice cream scoops made of sand or a salad of grass and daisies. The outdoor mud kitchen almost looks like a kitchen for adults: a kitchenette with a worktop, cooker top and kitchen utensils such as pots, pans and ramekins.

A DIY mud kitchen is great fun for the kids as well as a great DIY project for the adults. A DIY mud kitchen made of Euro pallets is also individually tailored to the children's needs. To be able to use the outdoor play kitchen properly, the little chefs and cooks must be able to stand firmly. The manufacturers of mud kitchens usually recommend them for children from the age of three.

List of tools, materials and aids

  • Paint spraying system, e.g. WAGNER Universal Sprayer W 100
  • Cordless screwdriver
  • Potentially a Forstner bit
  • Jigsaw
  • Sander
  • Hammer
  • Multifunctional tool
  • Pencil
  • • Ruler
  • Tape measure
  • spirit level
  • 2 Euro pallets
  • 2 wooden boxes or fruit crates
  • 1 wooden chest with lid
  • 1 small wooden box
  • 2 glued wood panels (cut to size at the DIY store)
  • Weather resistant coating
  • wood screws
  • Plastic pipe
  • Potentially shelves
  • Magnetic catch
  • Decoration

Important tips in advance:

When building your own mud kitchen, always make sure that you sand the pallets well. Children's hands are very sensitive and get hurt easily. Nails should also be driven deep enough in a wooden mud kitchen and not stick out. Also, always make sure that the play kitchen is stable so that it does not tip over! Use a spirit level for alignment.

You should also adapt the kitchen to the size of your child. The children's kitchen in the video is 1.20 m high and 1.60 m wide.

Make a mud kitchen from pallets: A step-by-step guide:

Step 1: Reinforce wooden chest with lid

Step 1: Reinforce wooden chest with lid

If the boxes used are tacked and not screwed, reinforce the boards of the boxes again with wood screws. Especially for the wooden chest with lid, you should reinforce the future door again. To ensure that the wooden door can be opened easily under the load of the worktop later, you can shorten it another half centimetre underneath with the jigsaw. Measure everything exactly with the metre stick.

Step 2: Place plywood as a worktop on the boxes

Step 2: Place plywood worktop on the boxes

Place the Euro pallets on edge next to each other and position the boxes in front of them.

You can have the glued wood panels for the work surface and the roof cut to size in advance at the DIY store to save time. The worktop does not have to be completely flush with the edge. You can leave them overhanging a little - this makes it easier to cut them for the sink later.

Step 3: Sink

Step 3: Drain sink

Take measurements from the inner container of the washing up bowl, then you can mark the outlines on the worktop with a pencil and ruler. Now pre-drill a hole for the saw blade and then cut out the surface with the jigsaw. Set aside the surplus wood from the cut-out for use later. Remove any protruding spacers from the handles on the plastic bowl with a multifunction tool, saw or cutter knife.

Step 3: Sink

Take measurements from the inner container of the washing up bowl, then you can mark the outlines on the worktop with a pencil and ruler. Now pre-drill a hole for the saw blade and then cut out the surface with the jigsaw. Set aside the surplus wood from the cut-out for use later. Remove any protruding spacers from the handles on the plastic bowl with a multifunction tool, saw or cutter knife.

Step 4: Attach wooden boxes to the pallets

Step 4: Attach wooden boxes to the pallets

Attach the boxes to the pallets with enough screws from the inside through the box. Make sure that it is stable. Connect the backs of the wooden crates to the pallets in this way and additionally screw the crates together for more support.

Step 4: Attach wooden boxes to the pallets

Attach the boxes to the pallets with enough screws from the inside through the box. Make sure that it is stable. Connect the backs of the wooden crates to the pallets in this way and additionally screw the crates together for more support.

Step 5: Screw the worktop to the wooden box

Step 5: Screw the worktop to the wooden boxes

So that the screws are not visible, you can mount the worktop inside the boxes. Be sure to use enough screws so that everything is stably connected - better too many than too few! You can also adjust the size of the shelf individually - in the video, a depth of 30 cm was chosen for the worktop and 40 cm for the kitchen roof.

Step 6: Round corners

Step 6: Round corners

To improve the appearance of the kitchen a little and make it more child-friendly, you can round off the corners of the kitchen roof. To do this, use a round object such as a flower pot as a template, mark the curves with a pencil as a guide and round off the edges of the glued wood panel with a jigsaw.

Step 7: Screw on the kitchen roof

Step 7: Screw on kitchen roof

Now connect the two pallets using long screws for stability. The roof can then be screwed to the kitchen wall above.

Step 7: Screw on kitchen roof

Now connect the two pallets stably with each other using long screws. The roof can then be screwed to the kitchen wall above.

Step 8: Attach small wooden box

Step 8: Attach small wooden box

Attach the small wooden box for storing kitchen utensils to the pallet with screws as well. With the leftover piece of the cut-out for the sink, you can also cut another small shelf and attach it to the kitchen wall from the back. In the video, the shelf is used to for ice cream cones - in this case, drill recesses into the shelf with a Forstner bit beforehand.

Step 8: Attach small wooden box

Attach the small wooden box for storing kitchen utensils to the pallet with screws as well. With the leftover piece of the cut-out for the sink, you can also saw another small shelf and attach it to the kitchen wall from the back. In the video, the shelf is used to let in ice cream cones - in this case, drill recesses into the shelf with a Forstner bit beforehand.

Step 9: Sanding

Step 9: Grinding

Sand all surfaces and edges throughly with the sander. Use 80 grit for coarse sanding and 120 grit sandpaper for fine sanding.

Wear a protective mask when working with the sander.

Step 10: Apply weather protection stain with a paint sprayer

Step 10: Apply weather protection stain with paint sprayer

Now spray everything with a weatherproof stain to keep the mud kitchen weatherproof. Use a paint sprayer such as the Wood&Metal Sprayer W 100. Working with a paint sprayer is less time-consuming than painting with a brush and the paint gets to all the places more easily.

Paint, stains and oils can be used undiluted, as they are sufficiently diluted. An advantage with stains: The natural grain of the wood is preserved and the wood is still breathable. If the wood stain is a little thicker, dilute it with water. Would you like to use an opaque colour? In this case, make sure that the paint does not contain latex or silicone.

Step 11: Insert shelves

Step 11: Insert shelves

Cut two squared timbers to size and mount them on the sides inside the box. On top of this, you then place an appropriately cut remnant of the already used plywood, which you have previously sprayed with stain.

Step 12: Creative design of a mud kitchen

Step 12: Creative design of a mud kitchen

An important step in building a mud kitchen! Design the children's mud kitchen according to your ideas - and of course those of the kids.

Mud kitchen: Design ideas

1
2
3
3
4
5
6
7
8
9
WAGNER Group W 100 Produktbild

Wood&Metal Sprayer W 100

The handy solution for small and medium-sized projects with varnishes and paint.

W 100 FLEXiO
Tips and tricks with Carina

Tips and tricks with Carina

We have summarised more tips on spraying wood and metal paints for you in our Tips and Tricks with Carina.

Apply glazes and lacquers correctly
Spraying woodstain: Guide & tips

Spraying woodstain: Guide & tips

Learn the best way to spray woodstain, what you should look out for, why it's worth spraying stains and what the best equipment is for it.

Spraying varnishes