Airless application of filler with glass fibre fleece

Paintshack, the owners of this newly built warehouse, wanted to ensure the walls did not suffer from shrinkage cracks as the new building settled. When using traditional gypsum plastering methods with new builds, this can be an issue, particularly where plasterboards join. After a period of time cracks can appear which need to be cut back then filled and redecorated.

icons8 kugelbirne 500

Why using filler with glass fibre fleece?

The main concern with this new warehouse was that the walls were going to have permanent racking constructed in front of them. This meant any future repair of the walls was going to be difficult to achieve without a substantial amount of upheaval. They needed a solution, which would last and not need to be redecorated shortly after installation. They also wanted a product which could be applied and dry out quickly as they were on a tight schedule and needed to get the job completed. The decision was made to use spray filler combined with a special fibre fleece, ideal for smoothing rough surfaces and bridging shrinkage and drying cracks on interior walls and ceilings.

The main concern with this new warehouse was that the walls were going to have permanent racking constructed in front of them. This meant any future repair of the walls was going to be difficult to achieve without a substantial amount of upheaval. They needed a solution, which would last and not need to be redecorated shortly after installation. They also wanted a product which could be applied and dry out quickly as they were on a tight schedule and needed to get the job completed. The decision was made to use spray filler combined with a special fibre fleece, ideal for smoothing rough surfaces and bridging shrinkage and drying cracks on interior walls and ceilings.

How to apply filler and glass fibre fleece with an Airless Sprayer:

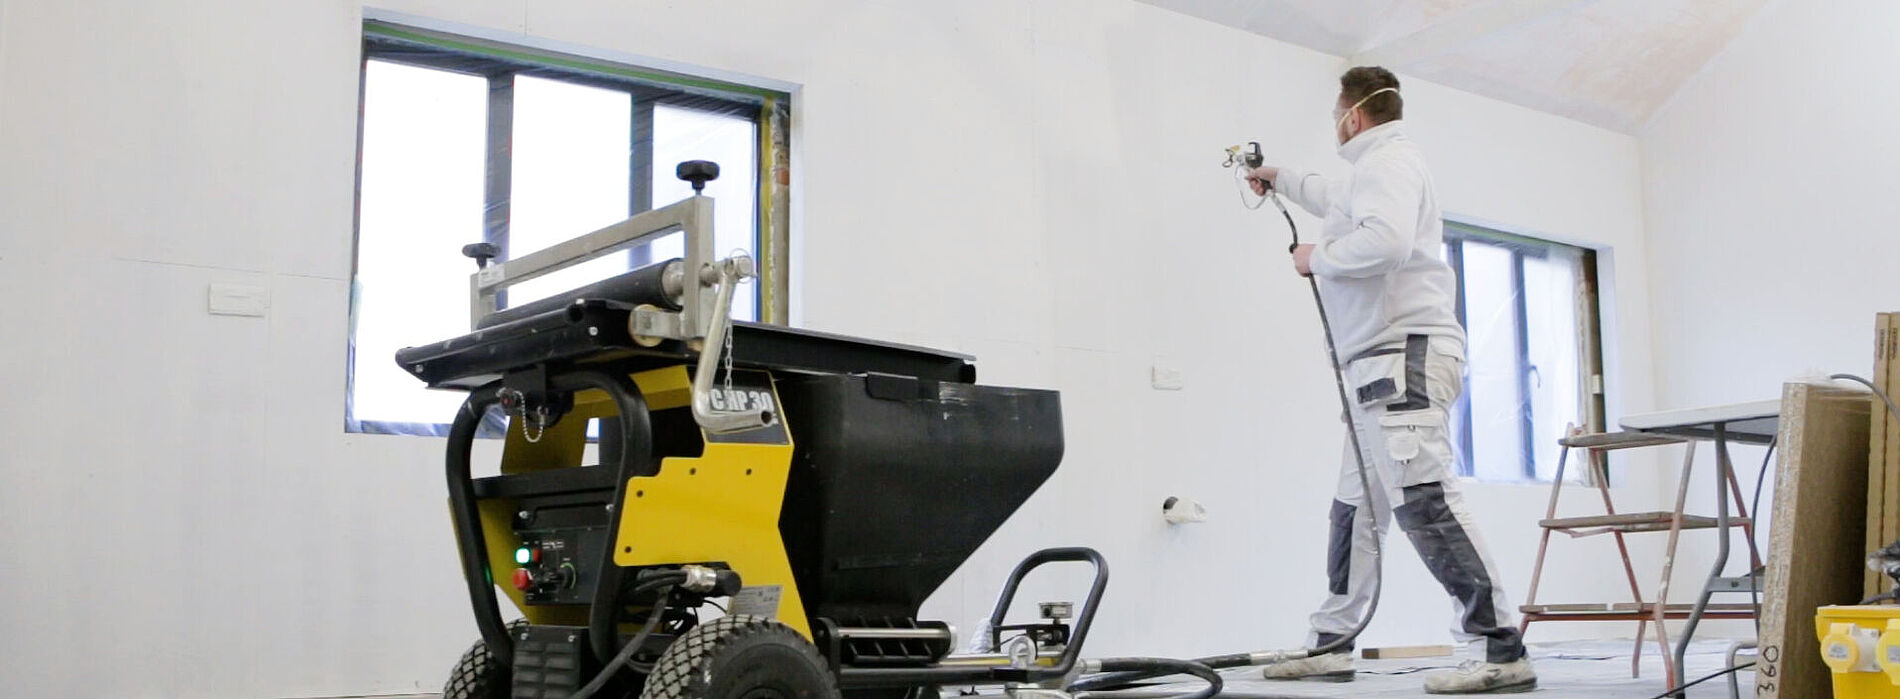
To apply the glass fibre fleece to the walls, filler is first sprayed onto the surface which must be firm, dry and clean. The machine used was the WAGNER HP 30 which is a robust spiral pump perfect for spraying highly viscous materials. Fillers can either be supplied in powder form, which is mixed with water to the required consistency for spraying, or purchased bagged and mixed, ready to be used.

Step 1: Masking

Step 1: Masking

Next any surfaces which are not to be sprayed need to be masked up. It is advisable to use masking tape combined with a plastic sheet to speed up the process.

Step 2: Loading the machine

Step 2: Loading the machine

The filler bag is easily loaded onto a Press Table (which is available as an accessory) the end of the filler bag is cut and the mangle is used to empty the contents of the bag into the hopper.

Step 3: Spraying filler

Step 3: Spraying filler

When spraying the filler, start moving your arm before pressing the trigger on the gun. Keep the gun moving at a steady pace, holding it at a consistent distance from the surface. Try and avoid a build-up of thicker layers of plaster during direction changes at the end of each pass. Sufficient filler is sprayed onto the wall for three drops of the fleece at a time which is approximately 3m of the wall.

Step 4: Applying filler fleece

Step 4: Applying filler fleece

It is best to work in pairs when applying the filler and fleece. One person sprays the filler while the other person cuts the fleece and then applies it to the wall. This will ensure that the filler is still wet when the fleece is being hung, meaning it can easily be pressed into the filler. Measure then cut three strips of the fleece slightly longer than the length of the surface to be covered.

Step 5: Cutting fleece material

Step 5: Cutting fleece material

Apply the fleece strips to the surface and, using a stainless steel smoothing trowel, blade or spatula, press the fleece into the filler whilst smoothing the surface.

Cut and discard any surplus fleece material around skirting, windows, ceilings etc.

Step 5: Cutting fleece material

Apply the fleece strips to the surface and, using a stainless steel smoothing trowel, blade or spatula, press the fleece into the filler whilst smoothing the surface.

Cut and discard any surplus fleece material around skirting, windows, ceilings etc.

Step 5: Cutting fleece material

Apply the fleece strips to the surface and, using a stainless steel smoothing trowel, blade or spatula, press the fleece into the filler whilst smoothing the surface.

Cut and discard any surplus fleece material around skirting, windows, ceilings etc.

Step 6: Overlapping strips

Step 6: Overlapping strips

Avoid pressing down approximately 5 cm in from the edge towards the next strip. Hang the next strip with an overlap of approximately 5 cm and press down to the seam area. Make a double seam cut, remove the surplus fleece and press the seam area lightly. Then smooth the filler in the seamed area. Now spray the next section of wall with filler again to cover about 3.0m and continue the process.

Step 7: Second layer of filler

Step 7: Second layer of filler

Once the first coat of filler plaster has dried, any raised areas can be sanded back. Finally, spray a second coat of filler across the entire surface and smooth down again with a trowel, blade or spatula. After the filler is dry, give it a final sand to achieve a perfectly smooth finish. The finish can either be left as its natural white or can be sprayed with emulsion paint to a colour of your choice.

More on applying spray fillers

See more on applying spray fillers in our Construction Site Guide.

As the filler is applied at a rate of over 10KG per minute this is the rapid way to cover surfaces with the right quantity of material. Please note when handling glass fibre fleece it is advisable to wear protective gloves.

Filling glass fibre fleece with the PlastCoat HP 30

In this application video you can see how to operate and prepare the machine and how to use it to fill glass fibre fleece.

By viewing the video you agree that your data will be transmitted to YouTube and that you have read the privacy policy .

Which WAGNER spray device can you use to fill glass fibre fleece?

For this project, the PlastCoat HP 30 was used, but there are other sprayers from us that are suitable for applying spray filler.

PlastCoat HP 30

PlastCoat HP 30

The PlastCoat HP 30 is characterised by its reliable and established technology. It is also robust and easy to use. The airless technology enables a high working speed and particularly high-quality surface results.

Go to product
HeavyCoat 750 E Spraypack / 230 V

HeavyCoat 750 E Spraypack / 230 V

Thanks to new hydrastroke technology, the operating temperature is reduced and thus the service life is increased, making the HeavyCoat 750 E durable and reliable. The constant performance when processing heavy and highly viscous materials such as fillers over large areas makes it a powerful machine.

Go to product
ProSpray 3.39 Airless Spraypack

ProSpray 3.39 Airless Spraypack

The most powerful pump in the ProSpray family is even suitable for airless spray filler, making it the perfect all-rounder.  It also offers increased suction performance due to low-lying suction valve and thus delivers more power.

Go to product