Kitchen renovation with Delari

Freshly painted kitchen furniture and stylish walls with an ombre-look

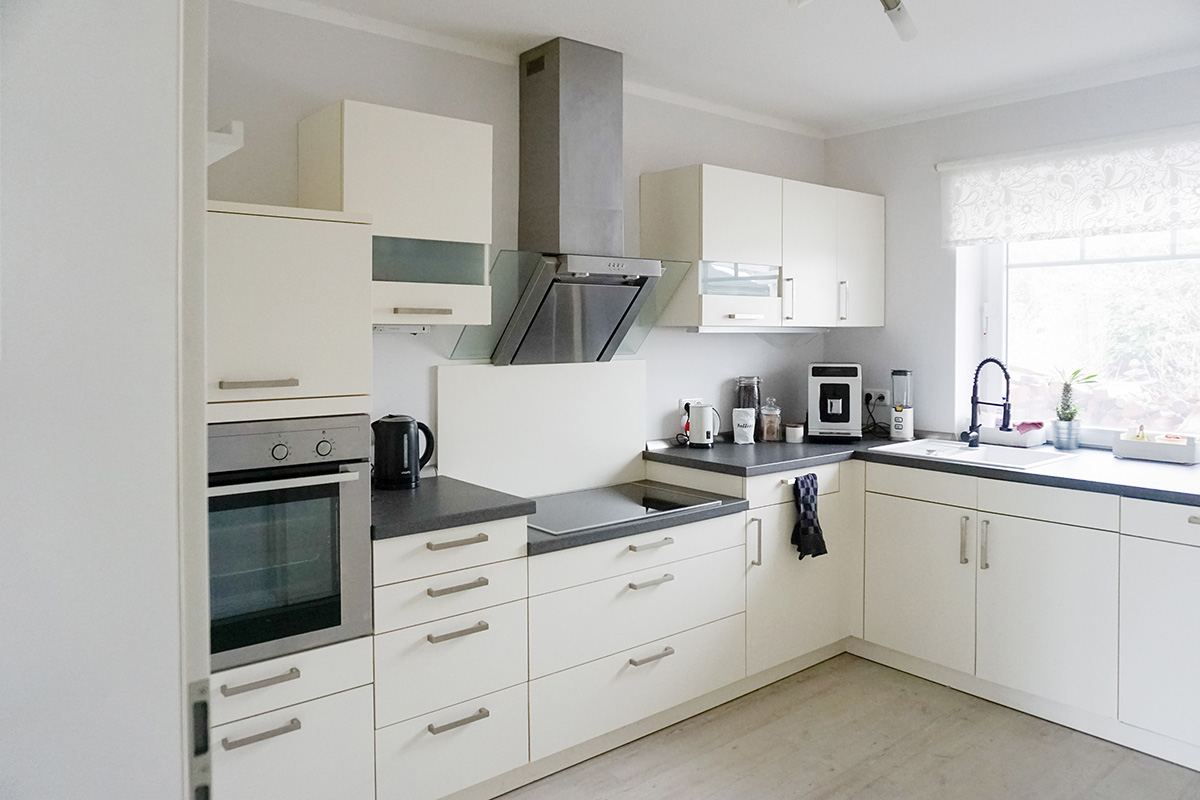
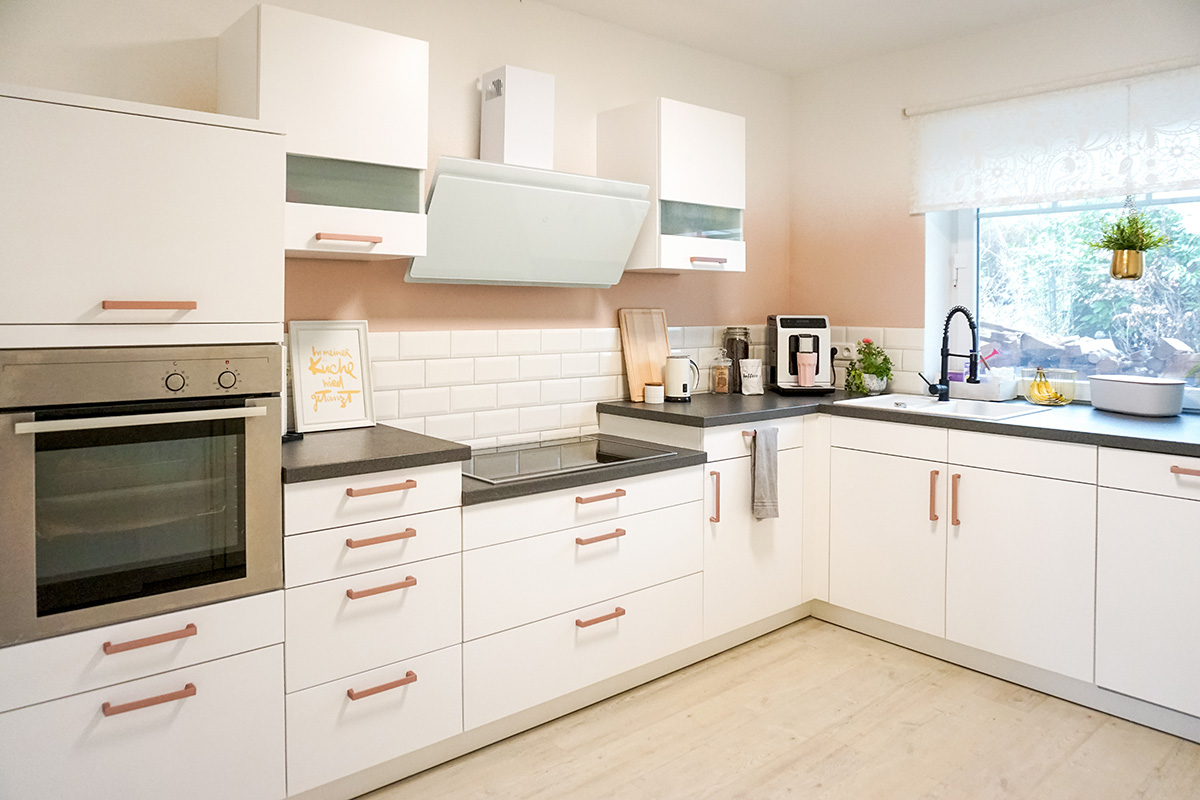
“I used to like it” – who doesn‘t know this statement, no matter whether people talk about clothes, hairstyles or the furnishings. Dress style and hairstyle can easily be changed, but when it comes to built-in furniture, for example in kitchens, it can quickly become complex and expensive.

The DIY blogger Nine from Delari has also asked herself this question: How can I renovate my kitchen quickly and cost-effectively? In the high-quality fitted kitchen, the cupboards and worktop still looked as good as new, but Nine was fed up with the vanilla tone of the fronts and was eager for a change. In rented apartments, you are often forced to take over the kitchen of the previous tenant – whether you like it or not. If you don‘t have the opportunity for a new, modern fitted kitchen, you have to come to terms with the taste of the previous tenant. Or do you? We have a simple solution: renovate your kitchen to your taste! You don‘t have to replace everything right away. Often a colour accent is enough to completely change the look. In addition to the wall colour, you can even apply new tiles with a little craftsmanship or give the kitchen fronts a new colour. But how does the new colour get onto the cabinets? Adhesive foils have been available for a long time. However, the more corners and edges the kitchen has, the more difficult it is to stick the films on cleanly. Together with Nine, we will show you a quick and easy way: Just spray it on!

By viewing the video you agree that your data will be transmitted to YouTube and that you have read the privacy policy .

Here‘s how it‘s done:

Wall design with colour gradient

Step 1 of 4: The preparation

The preparation

First of all, your kitchen must be prepared for the upcoming renovation. To ensure that you can easily reach all wall surfaces, remove the wall units from the wall. This is necessary for painting later anyway. Drill holes that are no longer needed or cracks should be filled in before painting.

Step 2 of 4: Colour selection and masking

Colour selection and masking

Choose your new favourite wall colour. Nine has opted for classic white and sets great accents with the trend colour hydrangea. Then all you need to do is get the paint spraying system (e.g. the W 690 FLEXiO from WAGNER) ready and off you go. Cover everything well that is not to be coated.

Tip: Use masking tape with integrated film.

Prepare paint and sprayer

Fill the paint into the paint container. We supply a practical funnel to help with this process. Often it is necessary to dilute emulsion paint with water when using viscous paints. Also for this you get an ingenious gadget from us – our yellow stirring stick. Not only can you stir with it, as the name suggests, but it also helps you to dilute accurately. One notch on the stick corresponds to exactly 10%. Super practical, isn‘t it? If you have thinned the paint, you should stir everything again. This is best done in a bucket with a cordless drill and a stirrer or in a container with a stirring rod. Now screw on the paint container to the spray attachment and then connect to your device.

Step 3 of 4: The spraying

The spraying

Before you really get started, it is always a good idea to carry out a spray test on a cardboard box. This way you can easily test the correct settings on the device. Then it‘s time to hit the wall! When spraying, it is important that you work at an even pace and parallel to the wall.

Step 4 of 4: The Ombré effect

The Ombré effect

For the ombré effect, start at the bottom of the wall and first spray a solid colour as usual. Then let the spray jet run out gently towards the top by increasing the distance to the wall.

Paint kitchen cabinets

Nine only wanted a small change in colour – the vanilla fronts were to become pure white. But there are no limits to your taste and imagination!

Preparation

Remove all wall units and fronts of the fixed cupboards in the kitchen. Also remove the doors on the wall units so that you can easily reach all the places later and hinges do not have to be taped off. Now find a suitable spraying place where you can also dry the already painted parts.

Step 1 of 2: Sanding and dust removal

Sanding and dust removal

Roughen all surfaces with sandpaper. It is even easier with a sander. The paint will adhere better later. Now remove dust and dirt from all kitchen cabinets and fronts.

Sanding and dust removal

Roughen all surfaces with sandpaper. It is even easier with a sander. The paint will adhere better later. Now remove dust and dirt from all kitchen cabinets and fronts.

Step 2 of 2: Spraying

Spraying

The preparation works in the same way as spraying wall paint – with the only difference that they use the spray attachment for wood and metal paints. You can recognize it by the fence symbol.

Spraying

The preparation works in the same way as spraying wall paint – with the only difference that they use the spray attachment for wood and metal paints. You can recognize it by the fence symbol.

Hang or lift the cabinets to ensure all the surfaces are easily accessible. Adjust your paint sprayer so you are only spraying a small amount of material at a time and spraying a thin layers. This will give you a perfectly even result. Let everything dry properly afterwards.

Tip: Even details such as the handles can be sprayed – simply use the detail spray setting

The result

Now the worktop, kitchen fronts and handles fit together perfectly and look modern and harmonious.

More projects

W 690 FLEXiO

W 690 FLEXiO

The universal paint sprayer for interior and exterior use

W 690 FLEXiO
Produktfinder

WAGNER product finder

Here you can find more products

Go to products